Hi everyone! Brace yourselves for a long post here! If you’re not interested in how we did it, scroll to the bottom for the Before and After shots.
When we first saw our current house, I knew the living room had a lot of potential, but would be a tricky room to decorate. It’s a large room, but it is long and narrow, with four doorways, a fireplace, two windows, and two radiators to work around.
Luckily, there was already a built in window seat over one of the radiators, flanked by cupboards with bookcases above them. Unfortunately, I didn’t love the design.
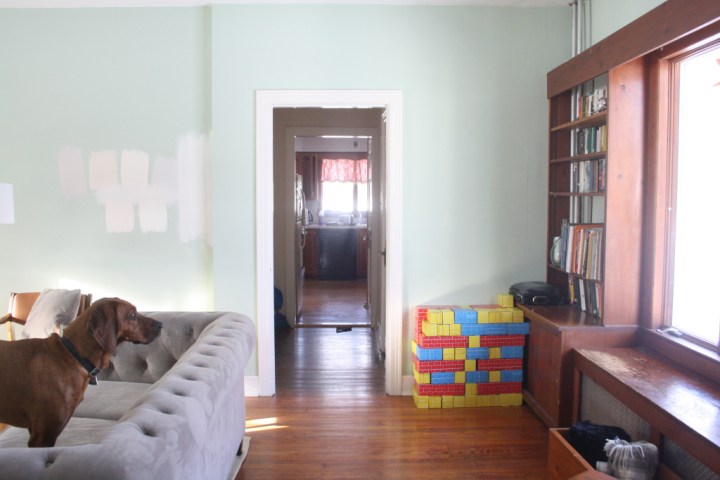
Here are some before photos – this was right after we moved in and plopped all our furniture down. (See this post for all of the before photos in the living room.)


As you can see, the bookcases ended at the top of the window, capped by a thick piece of wood that cut off the room and made it seem much darker.

Besides being a dark/ugly color, the wood was in bad shape from the previous owner’s dog.


The first thing we did was tear the shelves down to the cabinets. We left the cabinets and the window seat because we knew we could work with those to make them look how we wanted.


Then, we ripped the cheap wood molding off the window and found a molding that better matched the ones around our other windows and doors.


Then, we put up the sides of the bookcases. I wanted simple, straight bookcases that went from the cabinets up to the ceilings, with the area over the window open.
Someday, we hope to remove the radiator that’s here and put French doors out to a deck where the window is.

The side against the wall was screwed directly into the wall. The side against the window was nailed into the window trim, into the cupboard on the bottom, and into the brace piece you can see at the top (which is screwed into the ceiling).

A note about materials here – This is where I would change things if I could do it over. We chose to use these white shelving panels (which are MDF, not solid wood) because I thought I would want shelves I could move around. This project took more than a year to finish (because life), and by the time we got to the shelving part, I realized I would rather have stationary shelves. I also realized that we couldn’t just use regular 1x12s in real wood for the shelves because as most of you probably know, 1x12s are not actually 12 inches deep, they are a little shorter. When we tried to use one to make a shelf, it had a big gap in the front, because these MDF panels are exactly 12 inches deep. If I could do it over again, I would use all real wood. The shelves have a tendency to sag if there are too many books on them. We may end up having to buy 1x16s eventually and remake the shelves by ripping the boards down to 1x12s on a table saw. But I’m going to try to find a way to brace them better in the middle. You live and you learn!
Anyway, after your side panels are up, you will need to build a soffit at the top that your crown molding will go around (this is what makes your bookcases look built-in and custom).
First, we put bracing pieces that would hold the bottom of the soffit piece. We calculated how thick the soffit should be by measuring where our crown molding would reach and adding 3/4 in. That way, a little of the soffit would show beneath the crown molding.
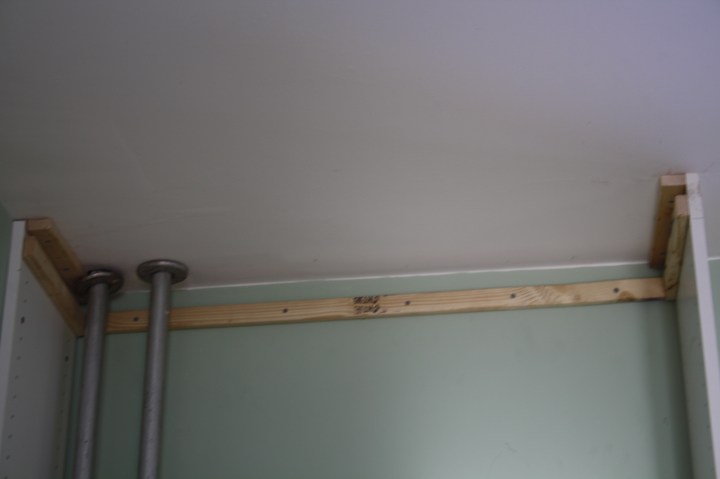

Then, we cut the bottom of the soffit to fit around the radiator pipes that go to the second floor. Steve used a jigsaw for this part.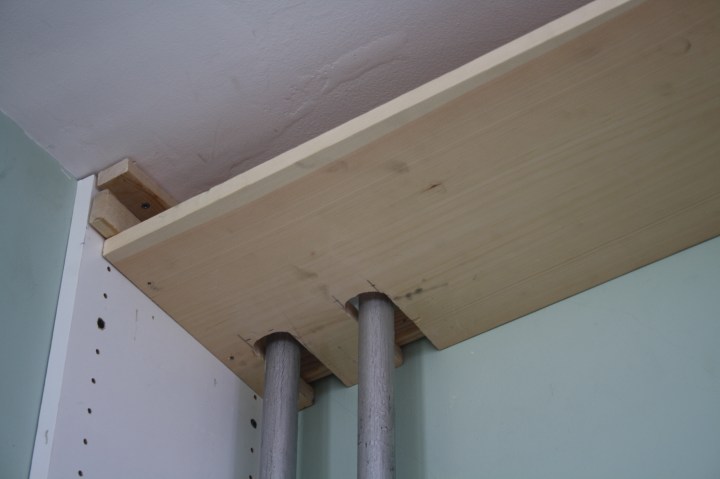
And that is when we realized the 1x12s were so much shorter than the MDF panels. We filled in the gap later on.
Then, we covered the front with a piece of wood to make it look clean and finished. We just used scrap wood for this and cut it long ways with the circular saw (a table saw would work best for something like this).
Once the soffits were in place, we added the crown molding around both bookshelves and in the middle as you would normally install it on the wall. We plan to finish it out around the whole room, (hopefully) by Christmas, which is why we left an angled edge on the wall side of the bookshelf (as you will see below).
After that, it was on to making the shelves.
We placed braces on the sides and back for each shelf to prevent sagging.

The space between shelves is entirely personal preference and should be calculated based on your own needs. I knew I needed large spaces for the bottom shelves because we have a lot of large coffee table books and we needed a space for our records, which are rather tall. So we placed the first shelf so that there would be a 13 7/8 opening on the bottom. The rest of the shelves make 11 7/8 openings, which is perfect for most books and accessories to fit. This left an awkward amount of space at the top that was too large for one or two shelves and too small for three 11 7/8 openings, so we split it equally in three to make three 8 5/8 openings. I really like the look of larger shelves on the bottom and smaller on the top, so I had expected to use the remaining space in this way. If you’d like all your shelves to have the same opening size, just divide the total space by the number of shelves you think you’d like and adjust it if the space between comes out too large or small.
Here are the bookshelves in various stages of progress over the year and a half we worked on them:
We finished one, and then primed and painted all the wood white (after filling all holes and digs and cracks with joint compound or caulk, then sanding). For the parts that were MDF panels (sides and shelves) I gave it a light sand and primed it with bonding primer, because the panels were pre-coated with a smooth finish. For the damaged top of the window seat/ radiator cover, I just flipped it and changed the hinges to the other side.


Last Christmas, it looked like this. I painted out the whole thing and put the Christmas tree in front of the unfinished side in the hopes that no one would notice.

Then, we traded the pretty coral couch for a more neutral black Le Corbusier knockoff and finished the shelves on the other side.


The second side was tricky because we had to cut all the shelves around the pipes with the jigsaw. Steve was a trooper to do this part (at my request ;).

We added 1x2s to the front of the sides to make them look more substantial.
Then, it was caulking, joint compound, sanding, priming, and painting time!

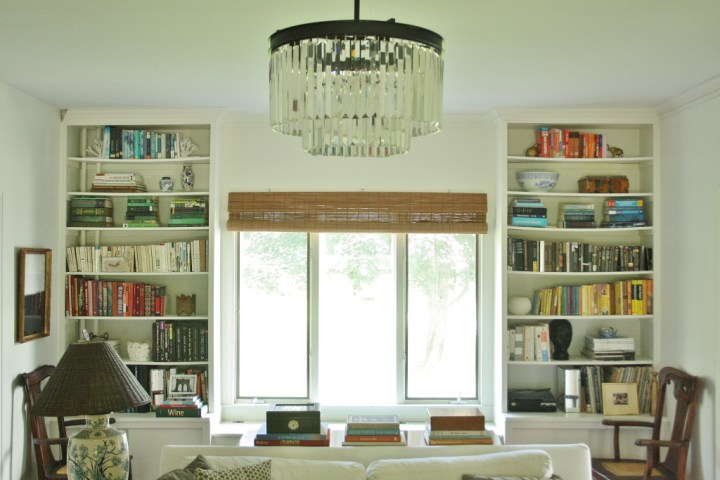
And here is the finished product!

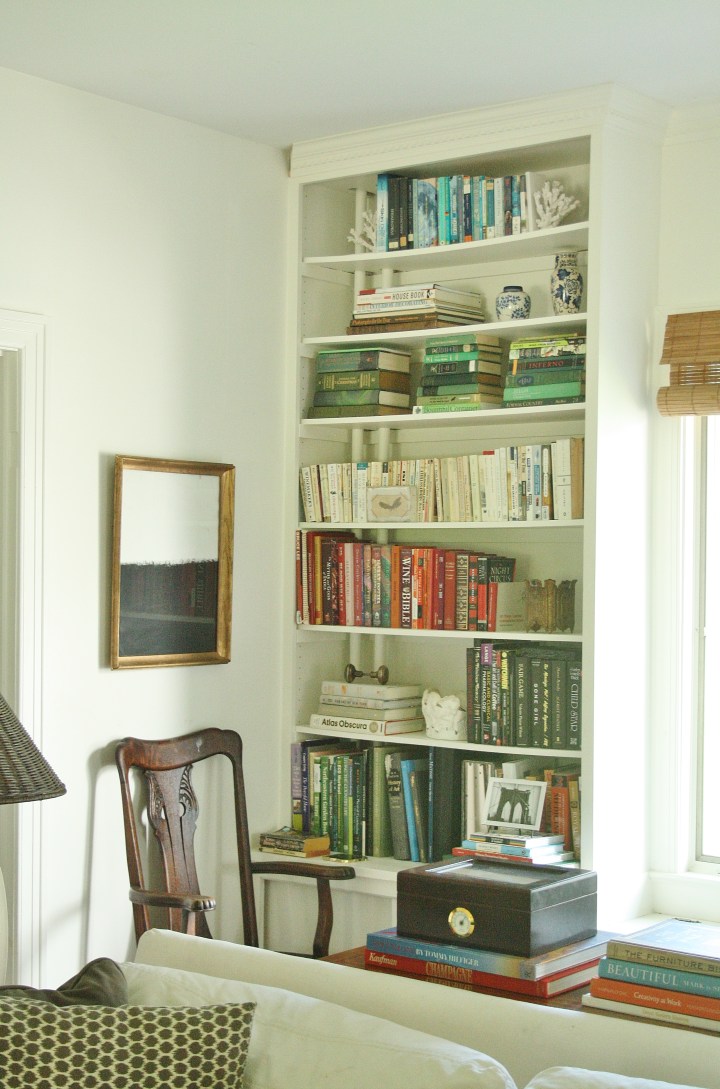


And of course – before and afters:


We still need to continue the crown around the whole room. I need to make a window seat cushion. I want to take out the sliding doors in the cabinets and build inset doors (that is sure to be an adventure). I’m going to look into a way to brace the shelves in the center, and then I might add 1×2 strips to the fronts of the bookshelves just to beef them up and make them look more substantial. I’ll update this post with any further updates!
A Disclaimer
We are not experts in DIY, but every project we do teaches us important lessons and gives us new skills. We make mistakes, but I would rather share our mistakes. There are way too many picture-perfect DIY blogs out there that make it look like no one ever makes mistakes — THEY DO! I hope by sharing we make everyone feel comfortable to try something new and also help others prevent the same mistakes we make.
For now, the bookcases create the look that I wanted. Admittedly, they may not last 20 years, but since we plan to do major construction on this wall at some point, adding French doors and removing the radiator, (and since we didn’t spend much by DIYing it!), that’s okay.

The 1×2 strips on the front of each shelf will act as a stiffener to counteract the sag if the 1×2 board is
A. Attached to the shelf when it is straight and not loaded and sagging.
B. Fastened at a tight spacing like every 4-6inches to the shelf. Make sure to drill small pilot holes through both the 1×2 and shelf so you don’t crack the shelf with the fastener since you fastening through the thin edge of the shelf board.
Thanks, brother!