
This post may contain affiliate links. We will receive a small commission when you shop the links.
The tiny half bathroom under the stairs was one of the roughest rooms in our house when we bought it in 2019. This post chronicles all the nitty gritty details of the renovation process, the problems we ran into, and the decisions we had to make. If you’re just interested in the before and after shots, visit this post!

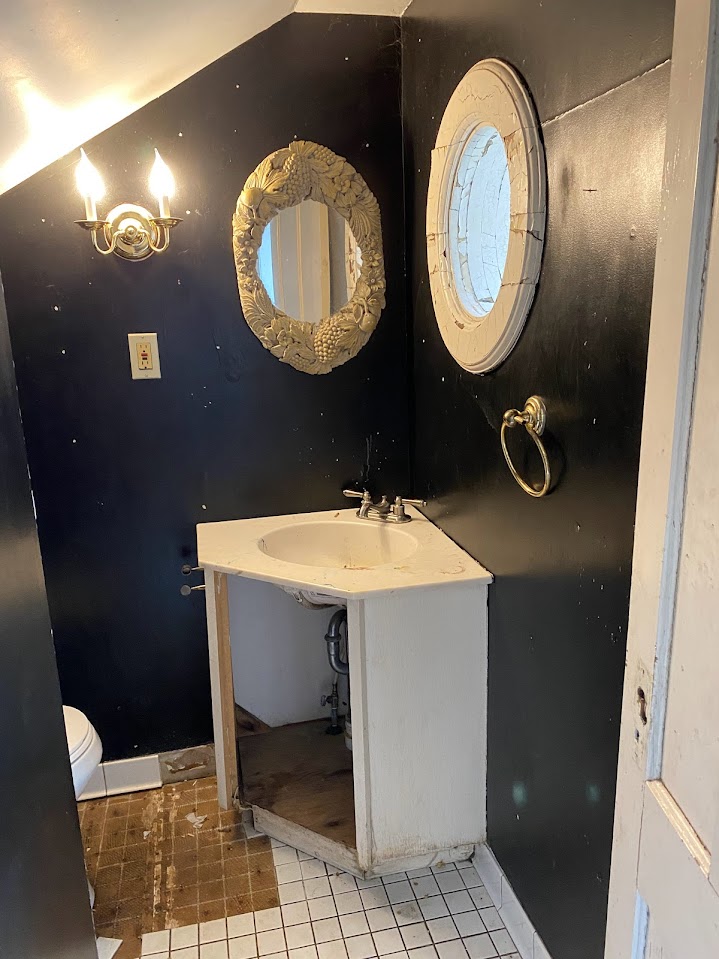
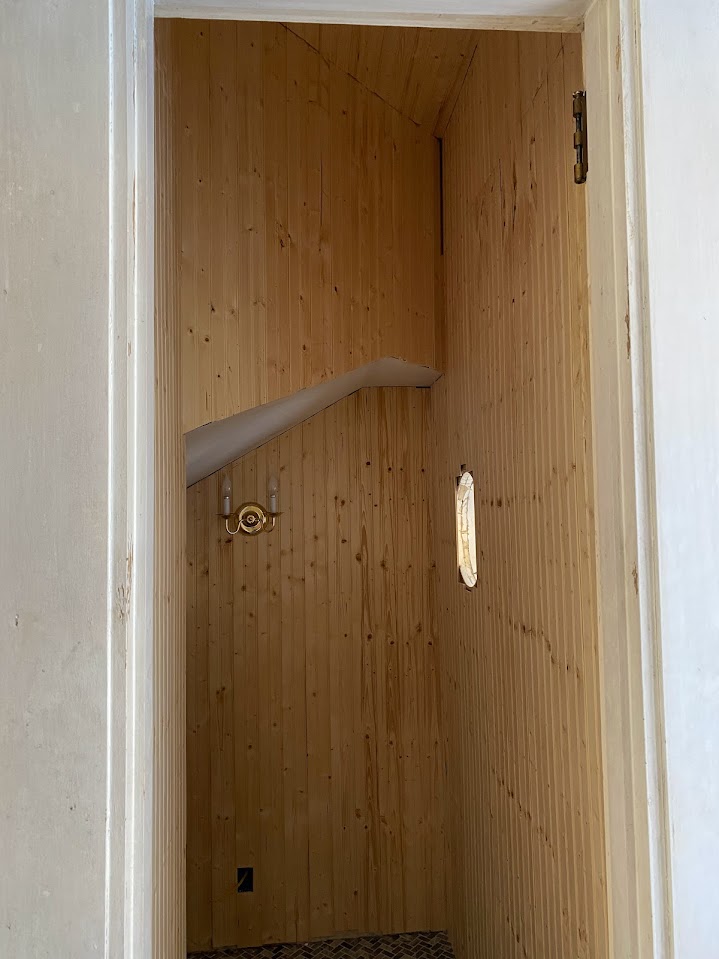
In our initial, “get it liveable” renovation we just replaced the toilet, fixed the sink pipes, installed an inexpensive wall sconce, and scrubbed everything top to bottom. It was still very ugly, but we used it until January 2022 when we had the time to address it and Steve started ripping it all out. By that time, the door was missing on the cabinet, the 1980s floor tiles were popping up, and it looked like this. Cringe!
One of the biggest decisions I had to make in this bathroom was how to address all the angled walls. I thought wallpaper in a small scale print would look beautiful, but I didn’t want wallpaper behind the toilet. Of course I could just repair the walls and paint it, but that felt boring. I considered adding paneling just in the toilet nook, or around the room at the height of the toilet nook, but with all the other angles cutting up the room I thought that would be too much — and the paneling would meet up with the round window molding, which wasn’t ideal.
I always look to other old homes for inspiration, and when my brother in law bought a 100-year-old home for his family in 2021, I had my lightbulb moment. Many of the utility spaces — closets, cupboards, the attic — had beadboard cladding the walls and/or ceilings..

Our attic has tongue and groove and beadboard in spaces, as does our front vestibule, so I realized that beadboard was already a material that fit naturally in our home.


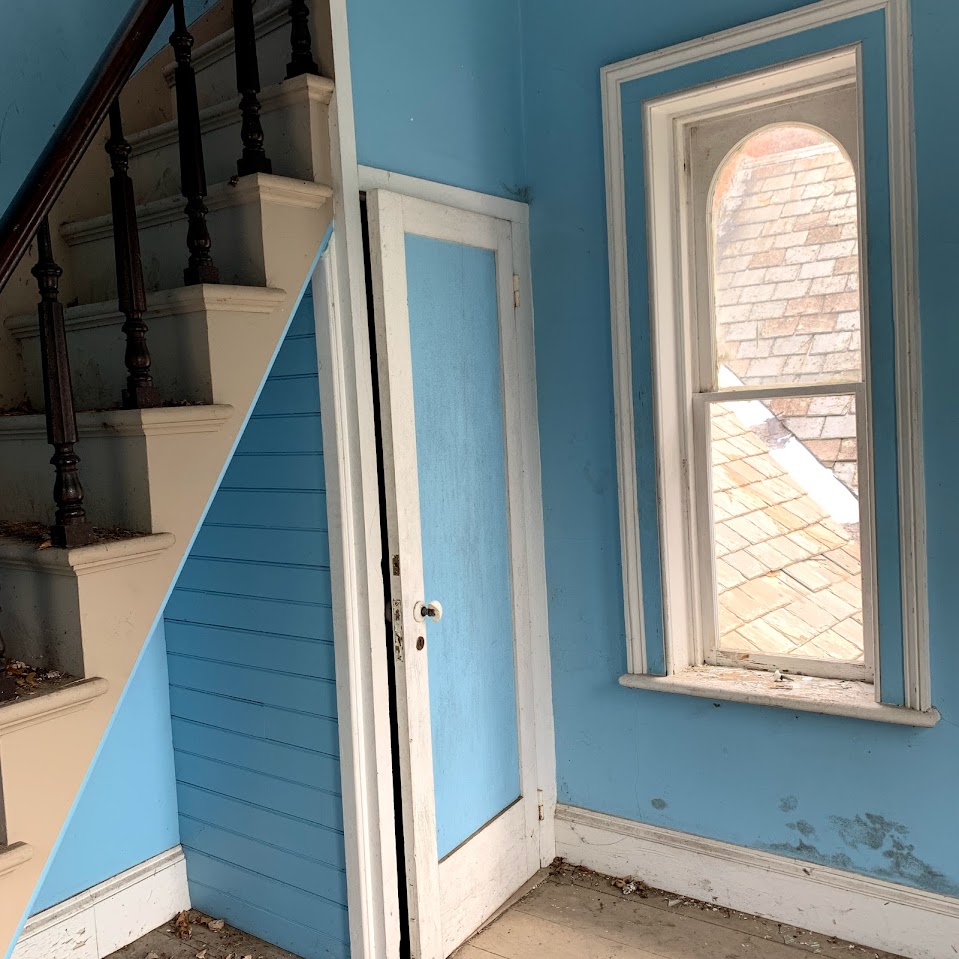
Since that bathroom was likely originally a closet, it made sense to have the walls and ceiling in beadboard. (I will likely do the same with the closet next door to the bathroom.) I loved this idea aesthetically and functionally, because it would add interest and texture to the walls while being a substantial, cleanable surface.
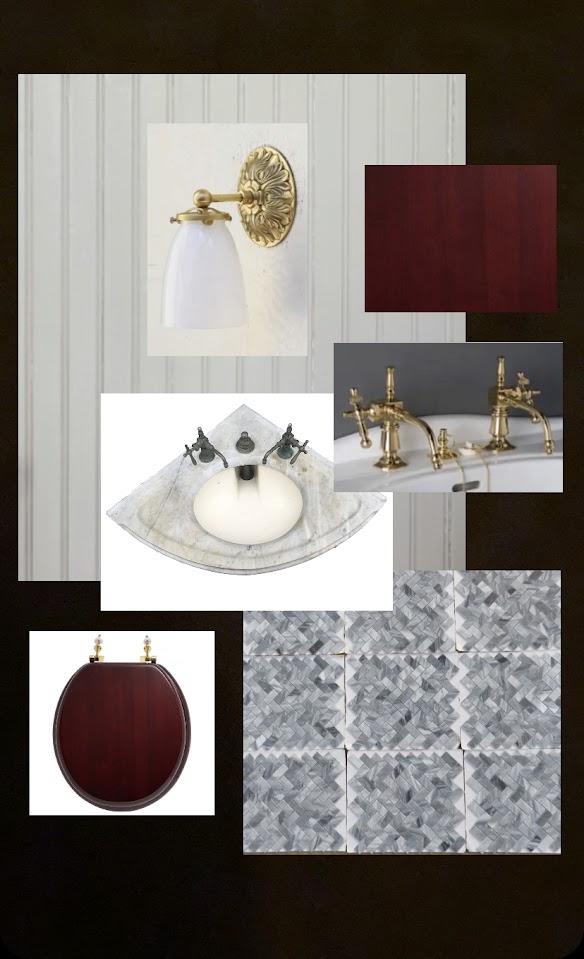
This was my first moodboard for the powder room after I decided on the beadboard walls. A moodboard is nothing more than a rough draft for me, and as you will see, some things changed.
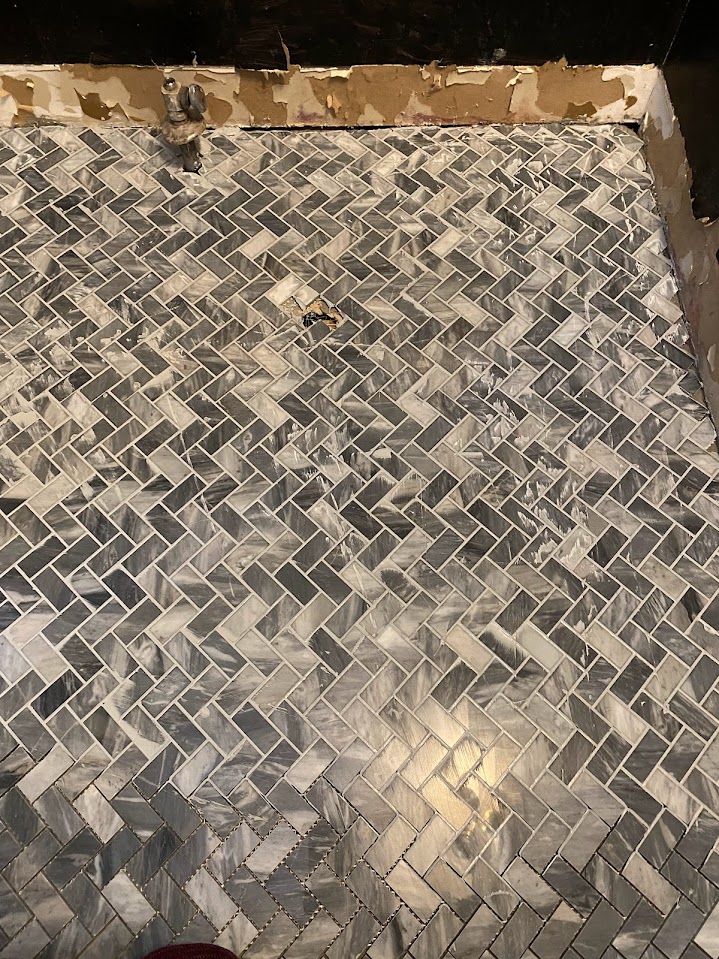
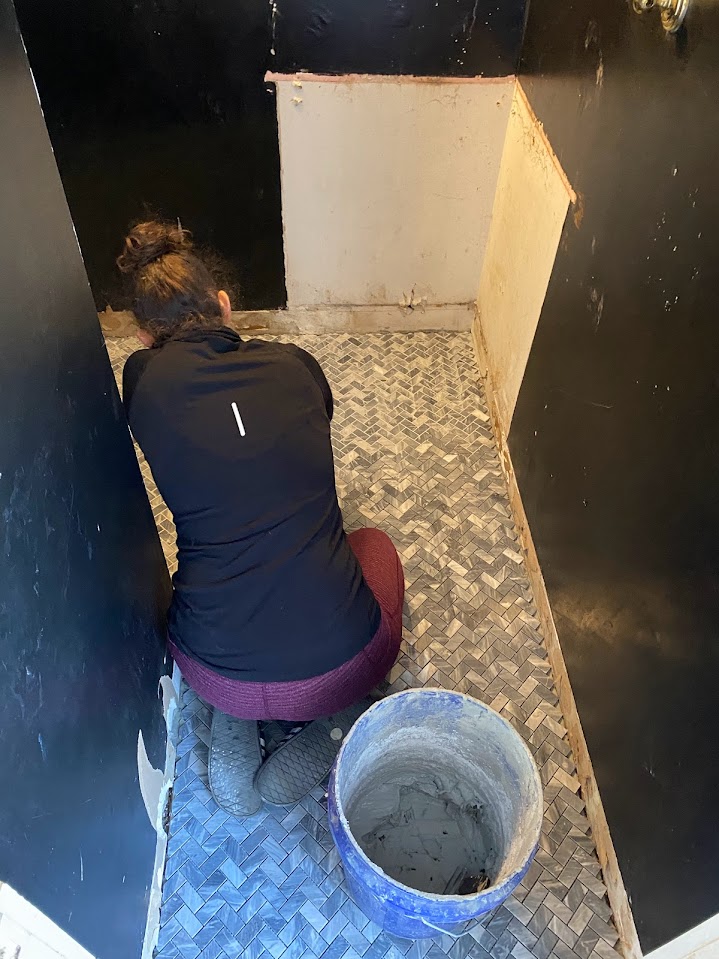
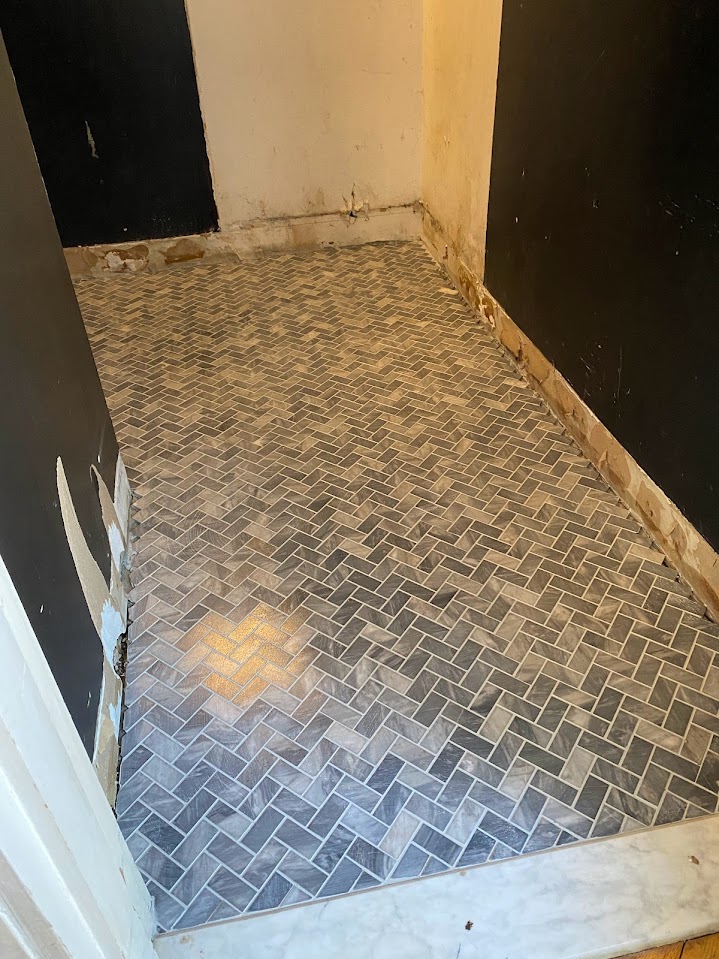
After we removed all the fixtures, the first step was laying the floors. The floor is something I’m really proud of — Steve and I have done a couple tiling jobs ourselves, but this is the first one I’ve felt really happy with at the end (the reality of DIY is that it takes practice, and the first few tries might not be perfect). We bought the herringbone marble tile from Marble Online, and we were so pleased with the customer service. They asked for the measurements of the room, and laid out how much tile we would need, and then hand picked the tile so that the natural variations all worked together, and had us give them final approval. We laid all the whole sheets first, followed by whole individual pieces popped off the mosaic sheet, and then we cut all the tiny angled pieces to fill in along the edges. Since we were adding baseboard back afterwards, that gave us some wiggle room along the edges.

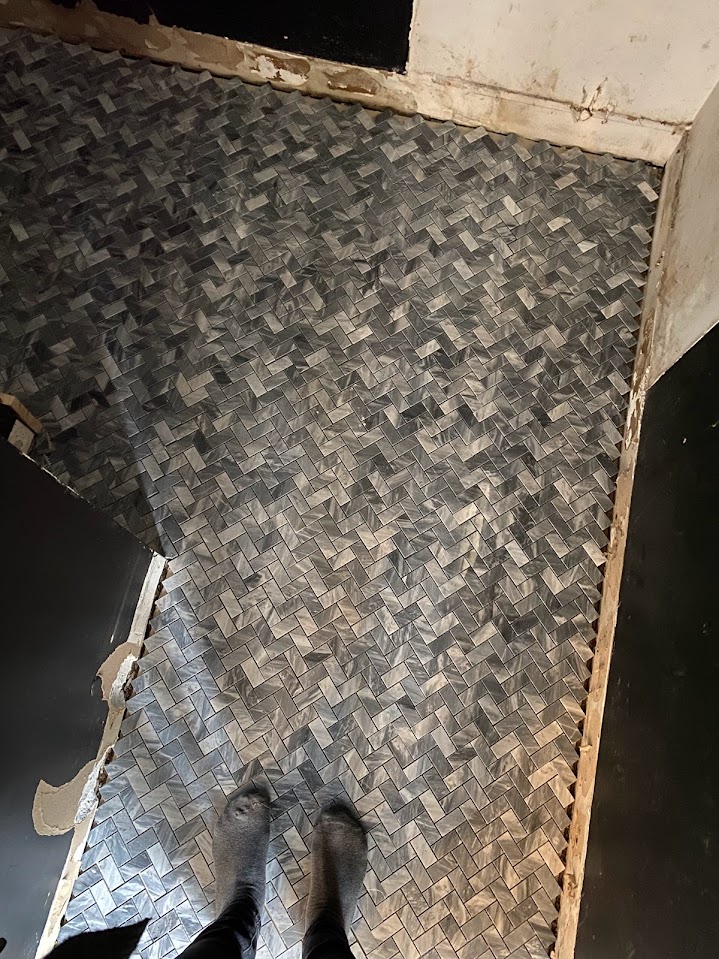

The only regret I have with the floor is the grout color. We were in a rush to finish the floors before Easter, and I made the grout color decision over the phone with Steve while he was at the store and sending me photos of the grout – why! So it is lighter than I would prefer, and I briefly considered using grout paint on all those little seams, but then I decided it’s fine as is and would inevitably darken over time. There is never a room renovations without a couple regrets.
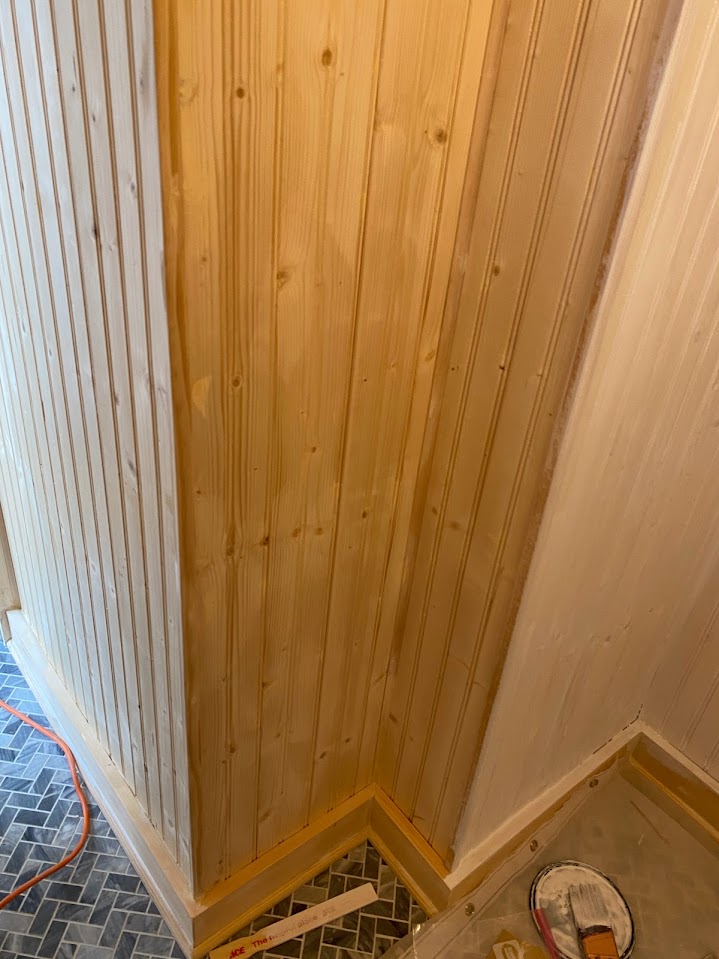
Next up, cladding the walls. Steve started by nailing the beadboard in place on the longest walls first. We chose this tongue and groove beadboard – the benefit of using this was that it is very thin and wouldn’t take away any of the precious inches in this bathroom, or make us have to build out the window further to meet the trim. I had to make decisions on the direction of the beadboard on each angled wall.

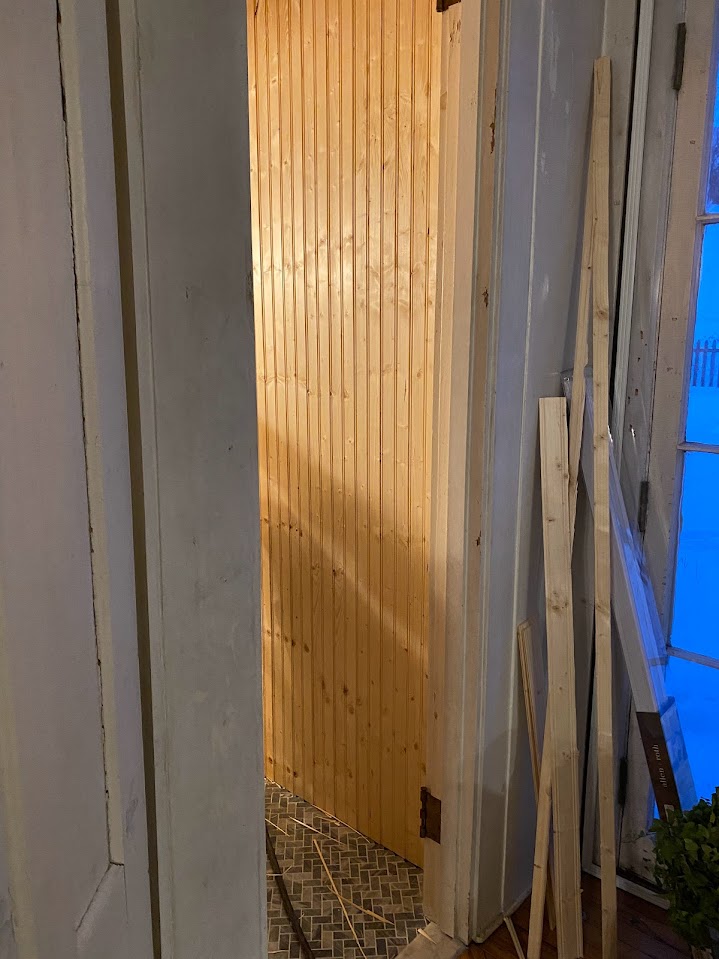

We couldn’t find beadboard in stock that was tall enough to reach the top of the long walls, but I had seen old homes that had a seam covered in trim near the top of the wall, so I took that as permission to do the same here. I love discovering make-do details that still look beautiful.

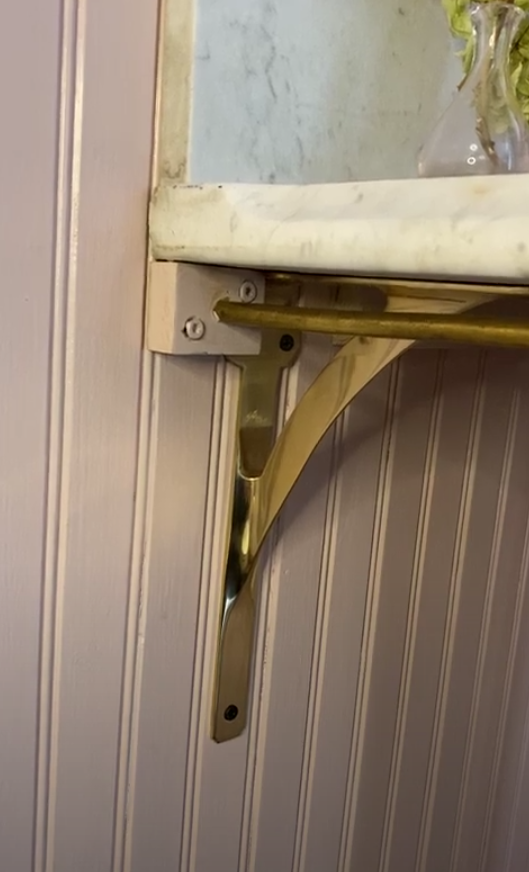
Of course, with all the angles, we had both outside and inside corners where we had to cover the seams where two pieces of beadboard met. We used this trim for outside corners, this trim for inside corners, and this trim for the flat seam at the top and the obtuse angle seam behind the toilet. The baseboard is a simple 1×3.


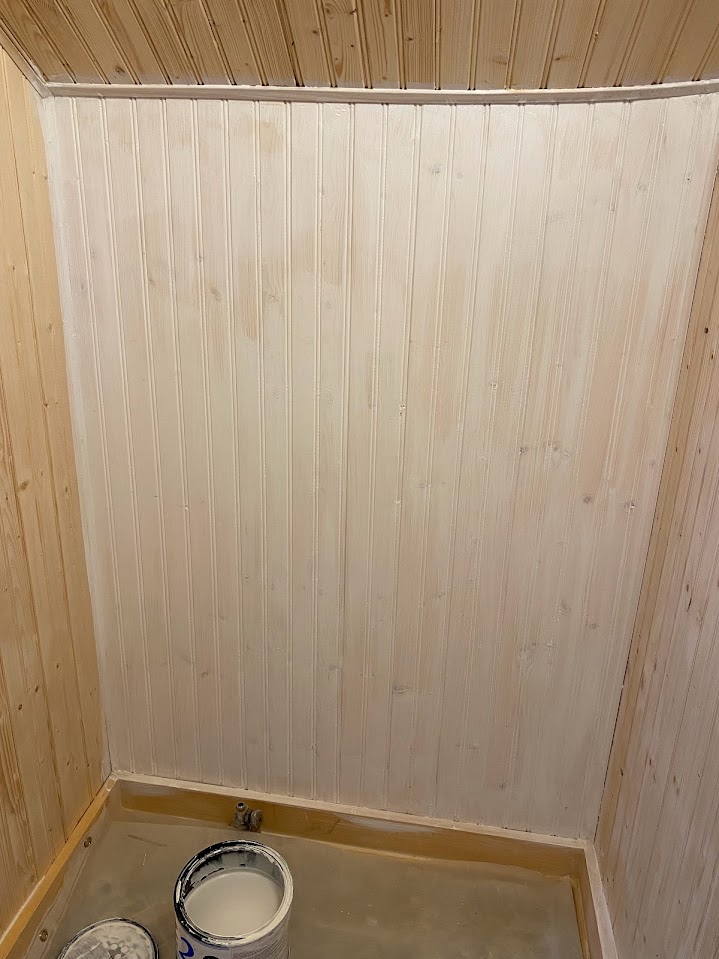

Even though the moodboard had a taupe paint on the beadboard, I quickly realized I wanted to use a color that was a little bit unexpected instead. I debated between pale yellow and pink beadboard for a long time but finally went with Sherwin Williams Pink Shadow in Emerald Urethane Trim Enamel, Satin. I love the way the warmth of the pink glows from the inside when the light is on. It always catches my eye as I walk by and gives me a little jolt of dopamine. Before I painted, I sanded the walls, primed with Kilz, and sanded again.


After the walls were painted, I changed my mind about the mahogany toilet seat. I had it on the toilet for a few months, but after multiple people pointed out that it looked purple with the pink walls (something I had been trying to ignore) I decided I had to change it to white. It was the right decision. I did change the handle on the toilet to this brass one and I love how it elevates the situation.


The sink bowl was something we found in the attic when we bought Danascara and it just happened to fit perfectly on an antique marble corner sink top I had been hoarding from Facebook Marketplace for this little bathroom since we put our offer on the house. Here it is when we found it.

The sink bowl cleaned up perfectly, but the antique marble sink top did not. It had a dark rust stain on it when I bought it, and I just assumed I would be able to get that out easily. Not the case! I tried many different methods — barkeeper’s friend, light sanding, and probably a combination of all the other methods definitely lightened it, but it is still very much there. I forgot to take a before photo. I have accepted the stain, as marble ages naturally, and I just think of it as part of the sink’s story. It was around for many years before us!
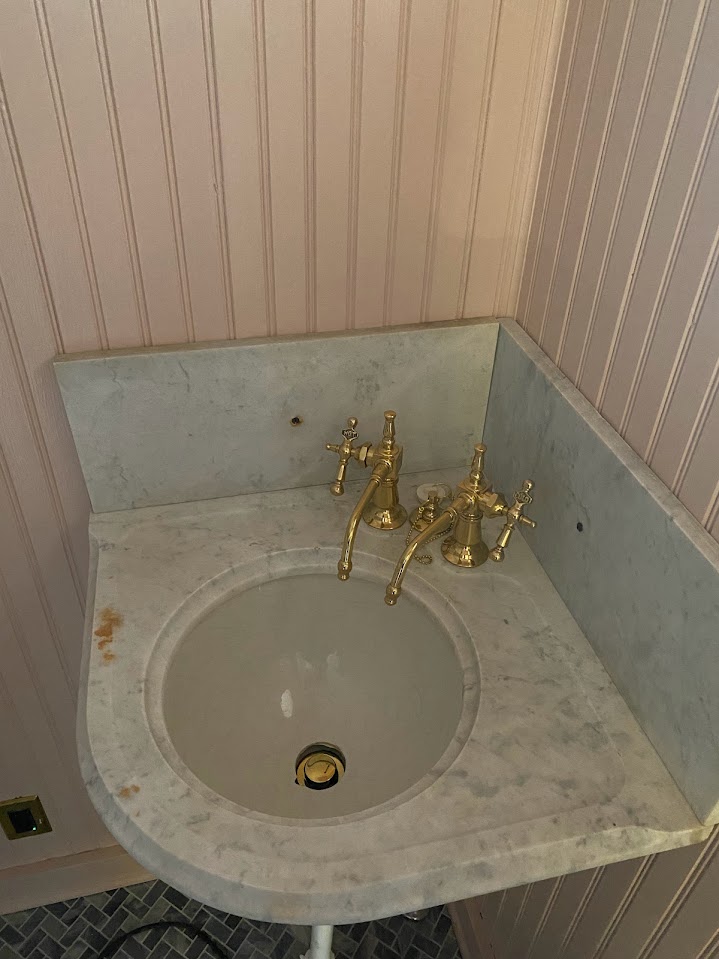
It was a search to find the separate hot and cold taps for the sink, but this Strom faucet was the perfect fit. It was definitly a splurge but I think it makes the room. It looks like this faucet (Strom Plumbing Fuller Faucet Set) has been discontinued, unfortunately, but I did find a few for sale here, while they last.
We had a lot of trouble plumbing the sink, as I had it mounted to the height I preferred with no regard for how long the pipes would need to be. Typically, sink pipes go into the wall. Since this is an old home, this was done differently many years ago, and we never opened up the wall to change the orientation of the pipes before the beadboard was applied. Oversights on my part due to my lack of knowlege of plumbing supplies — I just assumed you could find pipes in the finish you want in any size! Not the case – they are available in standard sizes, especially for specialty finishes like brass, which is what I wanted. This problem is by far what held up the bathroom process the most. Here is what the finished pipes look like. I did always plan to have a sink skirt, but I didn’t want the pipes to be pex or PVC even if they would be covered up. They are a bit cobbled together in the end, but they are mostly brass, and where they’re not they are metal, so I can live with it.

We also had trouble finding the correct drain size! Apparently this one is not standard and needed a drain that was 2.75 inches in diameter — smaller than normal kitchen sink drains and larger than standard bathroom sink drains. This is how the drain looked for months – it still worked without leaking but it was inset on the second drain hole inside the sink.

I ended up finding a sink drain – after literal months of searching and multiple incorrect drains ordered. Plumbing parts are really tricky you guys! (We still need to touch up that chip in the side of the drain hole – part of that last 2% that takes forever!)

Another hold up with the sink was figuring out how to hang the sink skirt. I didn’t want the skirt to attach to the top or face edge of the sink because I love the detail in the marble’s edge. My brother ended up coming up with the solution to order a solid brass rod, bend it to the curve of the sink, and make two wooden blocks that would attach to the wall that the rod could go into. I painted the blocks the same color as the wall, and they really go away once the skirt is up. If I want to change the skirt, all I have to do is unscrew one of the blocks – I did it just the other day to hem the skirt and it was super easy. The bar doesn’t sag around the curve because it is solid metal.


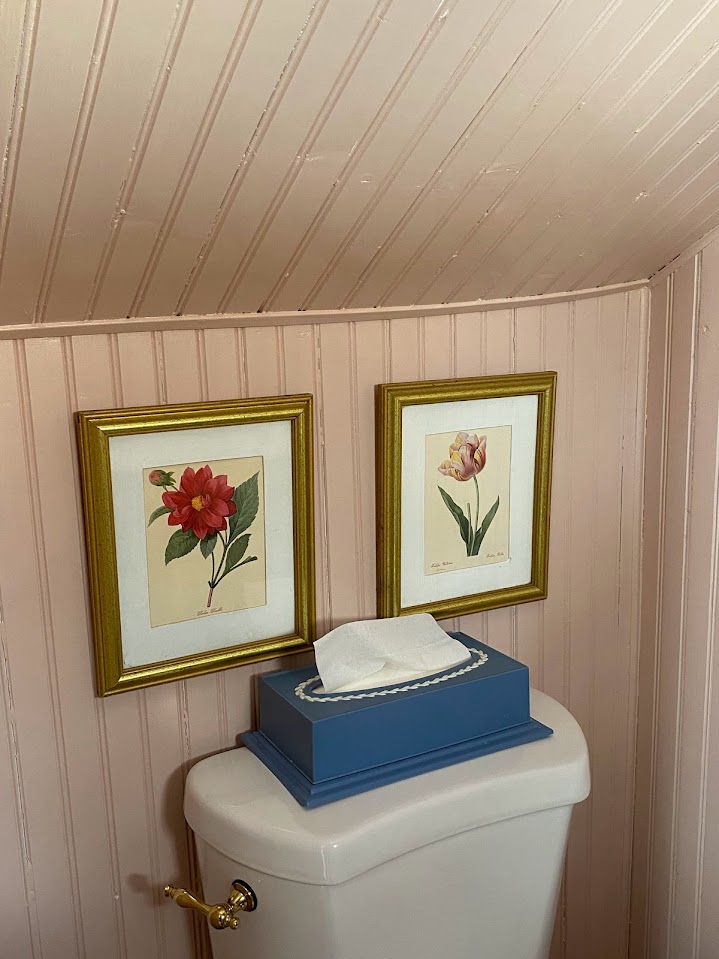
I made a quick sink skirt with this floral fabric I’ve had in my fabric stash for a few years. It wasn’t what I originally planned for, but I love it for now. It inspired me to dig out all of my botanical print art that hadn’t found a place yet to hang on the walls. Even though I had once thought to keep this bathroom very simple, I am now imagining the walls slowly becoming covered in collected botanical prints through the years and I kind of love that idea.

The sconce light I chose is from a shop on Etsy. Here is a similar one by the same maker. I love that it’s very simple overall but has beautiful details on the backplate. The milk glass shade lends such a cozy glow to the bathroom, and still gives off enough light for use in the evenings.

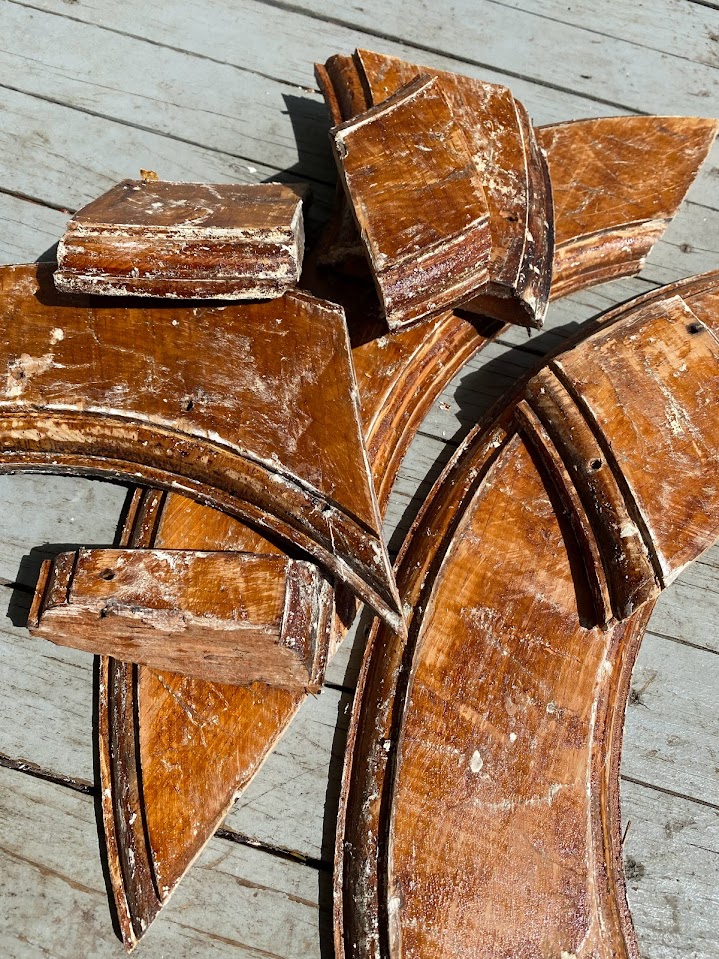
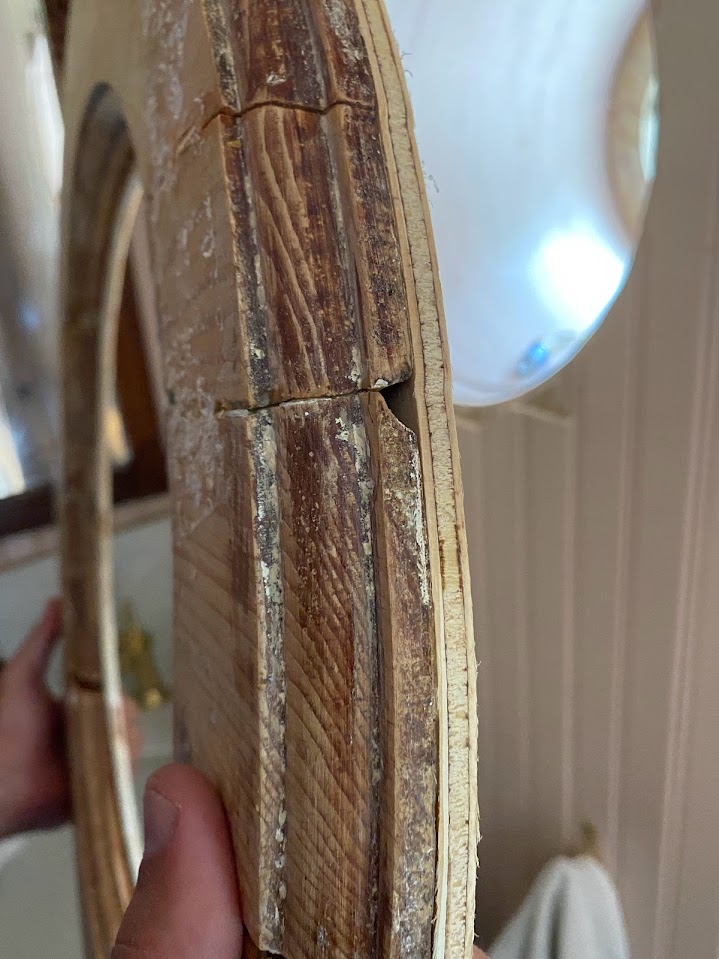
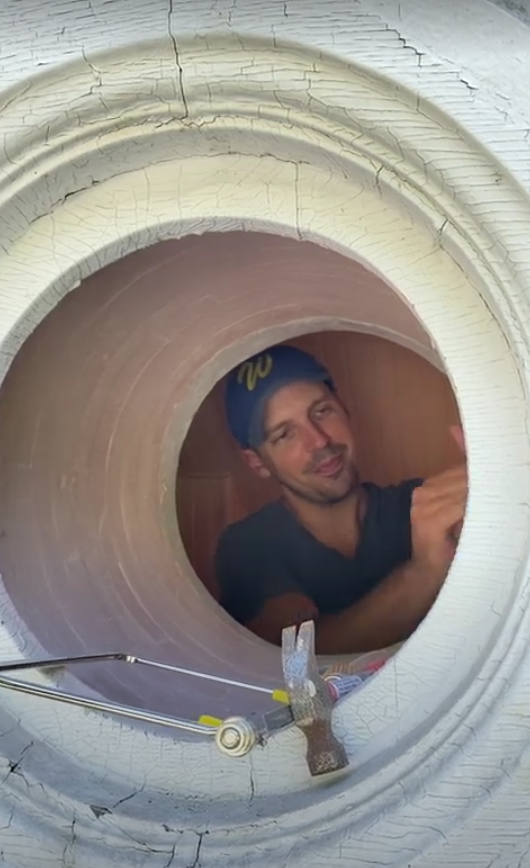
The round window was my favorite feature of this room from the beginning, but we ran into so many issues with it (a theme of this bathroom). When we took the trim off, we realized it was broken into several different pieces, and parts of it had been basically all wood filler. We had to strip the paint off the inside of the window well, the window itself, and the trim, because it was chipped and peeling. The only thing that worked to remove the stubborn paint was a heat gun – after a LOT of trial and error. I did as much of that work as I could outdoors because using a heat gun on lead paint creates toxic fumes.


The inside of the window really showed the art of craftsmanship with pieced strips of wood bent around the arc — removing the layers of paint really let that shine.
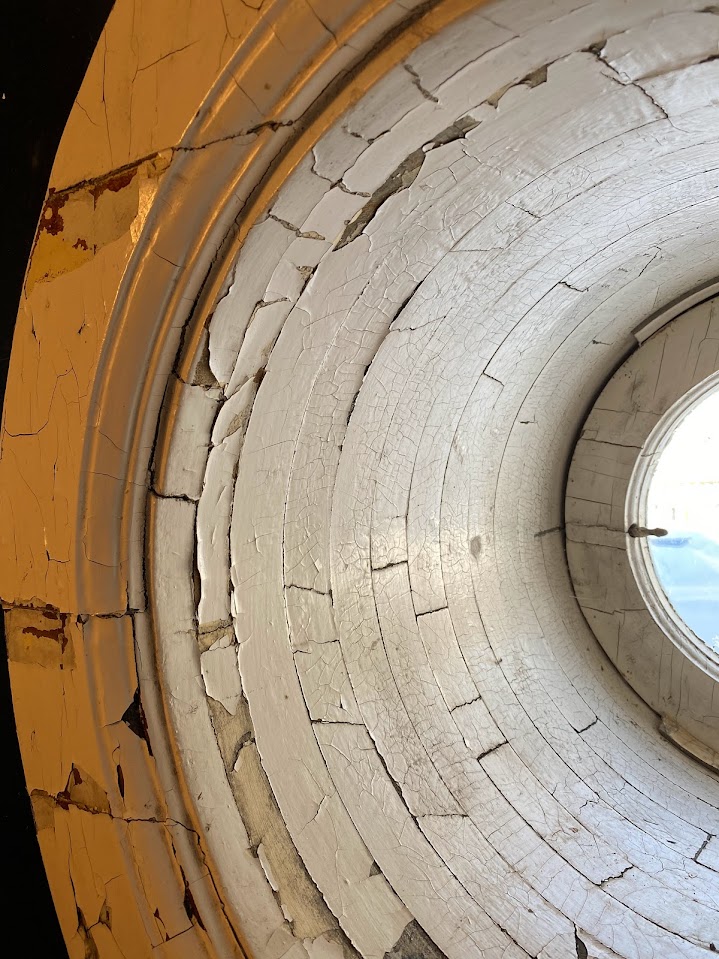


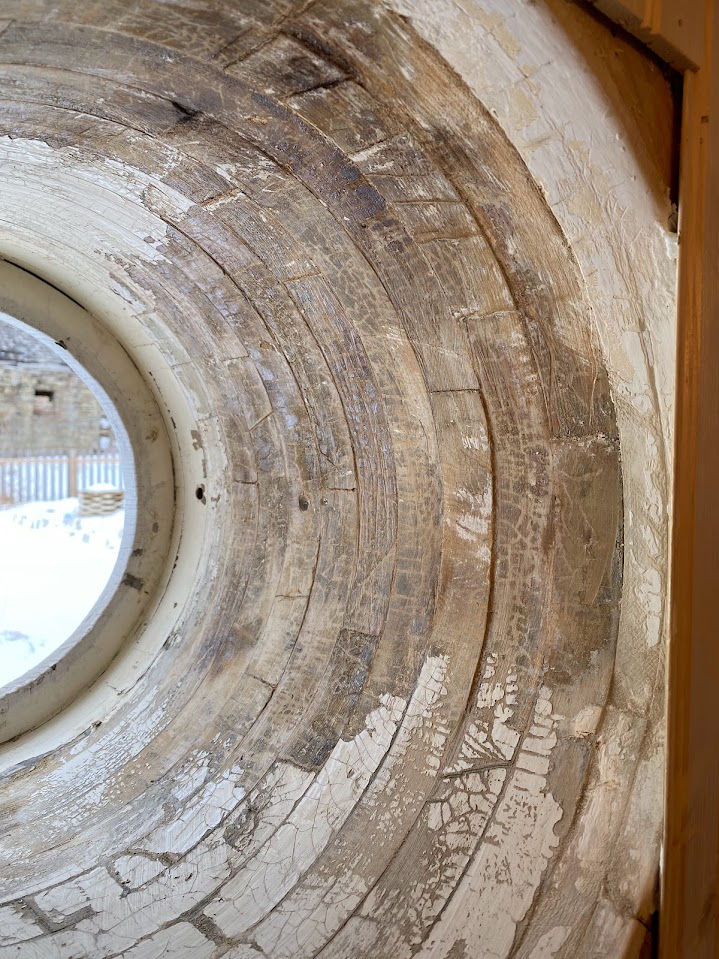

I sanded it down well, and even with the new coat of paint, you can see the texture of the construction. I considered staining it, but the end of the window had been built out with a softer pine to accomodate stud walls, which wouldn’t have matched. A coat of paint also protects the window from any moisture that could possibly get in through the window.
With advice from my friend Stacey I removed paint from the window, removed the old glaze, and Steve reglazed it.

The highlight of restoring the window was that the trim had “A. DeGraff” written on the back — Alfred DeGraff was a descendant of the home’s original owner who undertook the massive renovation that would transform the house into the 4 story towered Italianate it is today.

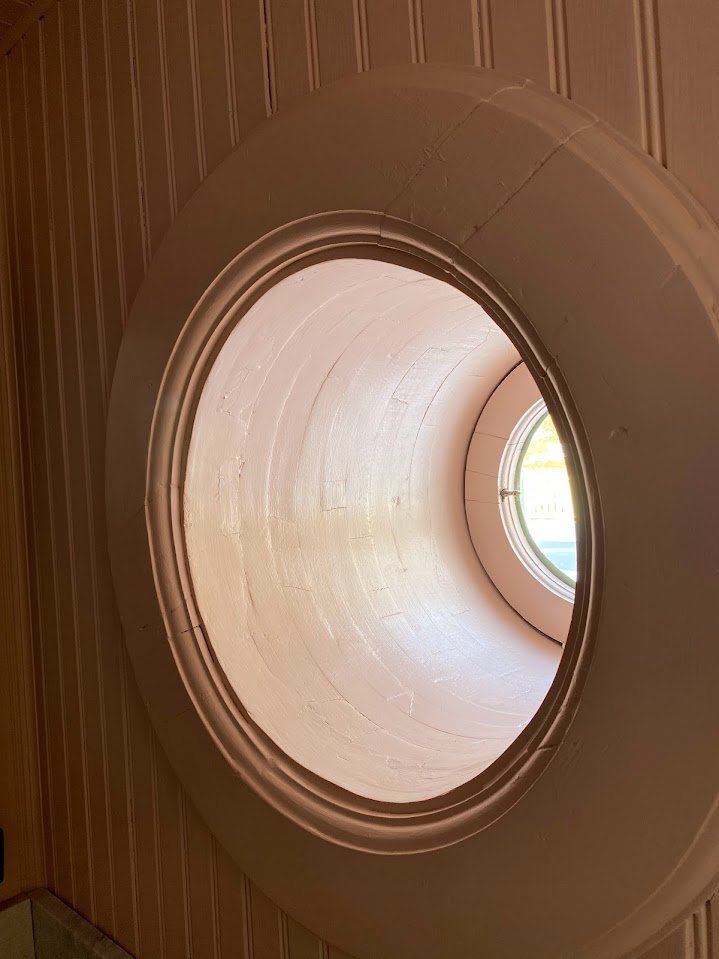
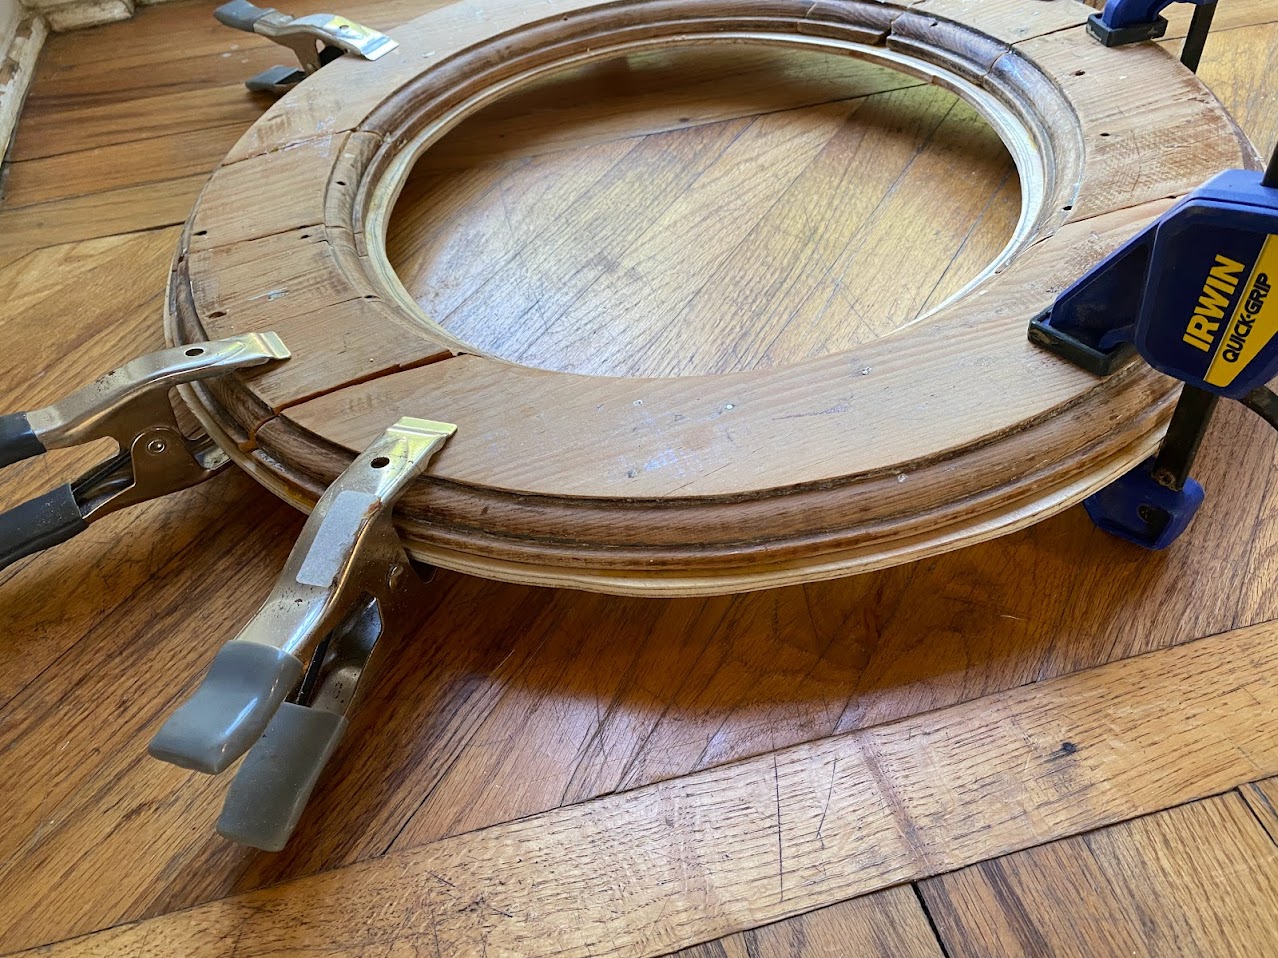
Getting that trim back up was a challenge. We had to piece it back together (should have numbered the pieces, in hindsight), and glue it in place. Then, we realized that the edges of the beadboard would show, as the trim is actually about 1/2 inch wider than the window well opening all the way around. Steve cut out a plywood circle that fit behind the trim and went to the edge of the opening. Then we used Abatron Wood Epox to fill the small gaps in the face of the trim that were previously filled with wood filler and to fill between the plywood circle and the window opening. We sanded all of that smooth, and painted it. We allowed the seams to show in the window because that’s part of the beauty of the home’s age and construction to us – we didn’t want it to look brand new.


I have dreams in my head of a wall treatment over the top of the beadboard, or maybe a little curtain over that round window for the summertime when people are out on the patio — we will see how this room evolves, but for now, it’s a pleasure to look at!
For full before and after photos, sources, and photo details, see this post.

Awesome job I totally relate to when you talk about seeing it when you’re walking through the hallway and how much joy it gives!
I love the color combination of the pink walls and grey floors. I hate that people are so prejudiced against pink.
Do you not have a mixer for the faucets? That’s something that always bugs me about antique sink fixtures. But for a powder room it’s not that big a deal.
I love the round window, too! Overall, superb job.
Thank you! I think pink gets a bad rep – it can fit so many different styles depending on the shade and the decor. The sink doesn’t have a mixer, which as you said, isn’t a big deal for us in a powder room. In a main bathroom I’d definitely want a mixer.