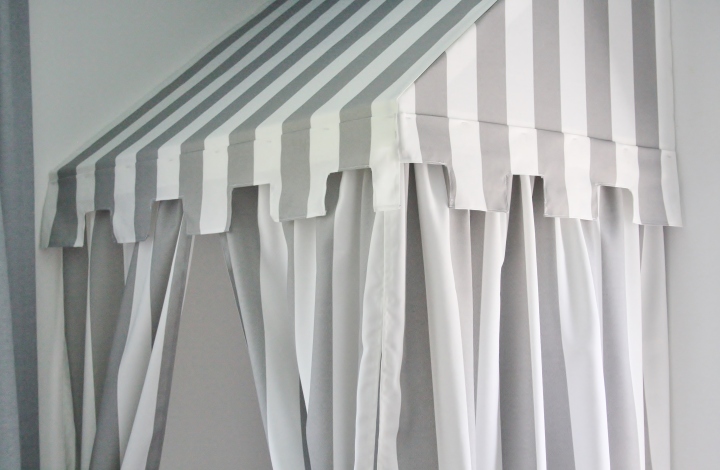
When I started the One Room Challenge for the kid’s playroom in the spring, I was really inspired by tented ceilings, like this one:

It adds such an element of fun to a playroom while still looking incredibly chic. But I felt that, with tenting, our 8-foot ceilings would look too low and make the room feeling cave-like. So then I came up with the idea to create a built-in tent that would create a fun spot in the room that set it apart from a utilitarian playroom. I found these images which helped me get an idea of what I wanted it to look like and how I could construct it.


I don’t know if it’s the connection to circus tents but the striped fabric just felt right.
I bought this indoor/outdoor cabana stripe from Best Fabric Store for a little under $9/yard — you can’t beat that price and it was great quality for the job. I chose gray and white so it would blend in with the curtains and not compete with all the other bright colors in the room.

But before I could think about the upholstery, I needed to figure out how to build the frame.
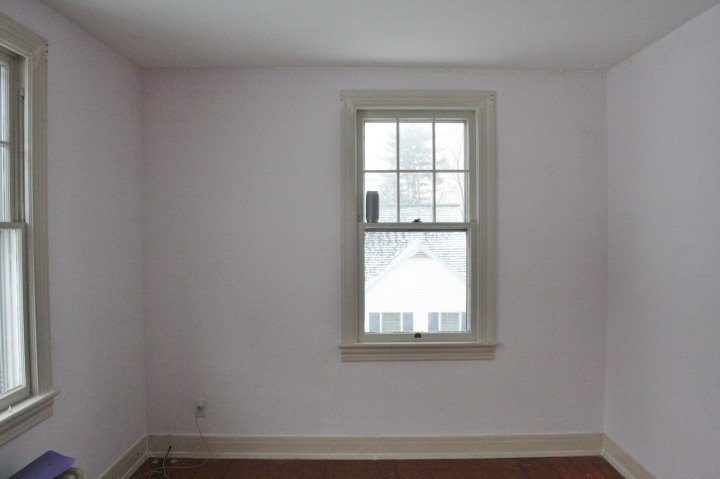
Below is the side of the room before we built the tent.

Steve and I worked together to come up with a plan, and figured some of it out as we went along. We knew it had to have a perfectly flat top for the fabric to lay on, and that it needed to be really sturdy (I just pictured the boys hanging and it crashing down – no thank you!).
The first thing I did was sketch a little picture of how I wanted it to look and where I wanted it placed in relation to the wall and ceiling. We knew we wanted to build a rectangular frame that was screwed into the wall that would hold the entire structure. It had to be far enough from the ceiling that the “ceiling” braces would have room to go in above it. We used 1x4s for this and long drywall screws to make sure they were not going to budge.

Then, we built a three-sided rectangular frame that would be the bottom of the tent, which the curtains would hang from. We used 1x2s for this, and just glued and nailed them together.

We attached this frame to the wall frame brackets on the top and bottom (with screws). The side against the wall was attached with drywall screws.


Then it was on to making the diagonal bracing pieces that would complete the triangular frame. Steve cut a 1 x 2 diagonally to attach to the bottom sides of the frame,

and on the other end of the 1×2 he cut a birdsmouth joint that would fit over the top of the wall frame, with a diagonal end that would fit flush against the wall. Not going to lie, I was impressed that Steve knew how to create this piece of joinery!

You can see here how the brace fit on the two pieces of the frame. We made sure to push the frame up to be perfectly level before screwing these braces in. Before these were in, the side of the frame that jutted out into the room was sagging down a bit.

We screwed the braces into the sides of the frame,

and directly into the wall on one side.

We also added a middle bracing pieces that had a birdsmouth joint on both ends (because it couldn’t sit flush against a side of the frame like the others did).


Here is how it looked with all three bracing pieces in.

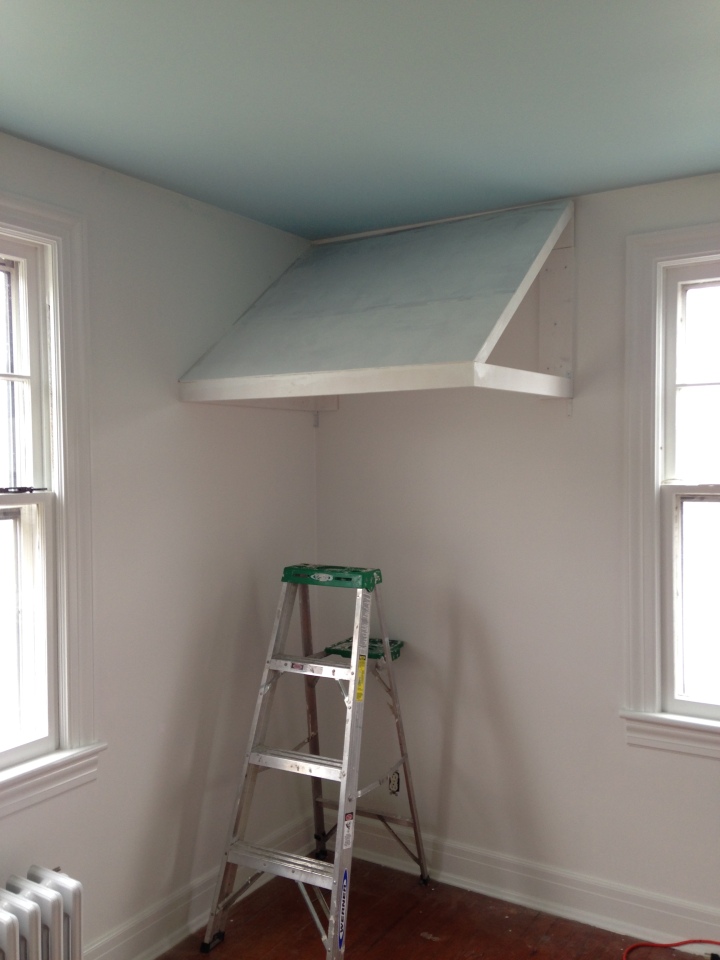
Then, we added thin pieces of lauan plywood to the top for a smooth surface that the fabric would lay against.

You can see how the side pieces are all flush with one another so that the side upholstery would also lie flat. We had to plan for this when we were coming up with the framing plan.


Then, I primed and painted the whole thing white so that it would look seamless from the inside and none of the wood colors would show through the fabric.


After that, it was on to upholstering. For the exposed side, I held the fabric up, and using a level to make sure the stripes were straight, I marked off a rectangular piece of fabric that I could upholster this triangle with. I’m not going to lie, I had to do this step twice because the fabric pulls and stretches strangely when upholstering a triangle. I folded over the side toward the wall so that I didn’t have to sew a seam. Then, I stapled the top and the bottom, pulling it gently taut beforehand. You have to work slowly, pulling the top and the bottom into place and holding the opposite side before you place a staple. I pulled the bottom part around the 1×2 and stapled it on the inside so you wouldn’t see the edge from the bottom. Then I trimmed off the excess all around.

Next I upholstered the top. I actually had to measure with this piece and use an iron to press the edges in so you wouldn’t see a raw edge. When measuring, check a few spots for width and length and use the largest measurement (unless your frame is perfectly square, in which case, I applaud you!). Along the top, I stapled only in the gray stripes where I could. Of course, the sides ended up both being white stripes, so I used a little white paint to paint the staples at the end. I stapled along the top first, making sure to keep the stripes straight. Then, I stapled along the side toward the wall, followed by the side toward the window. Finally, I folded the bottom under the 1×2 and stapled it on the inside, trimming the excess off the bottom at the end.

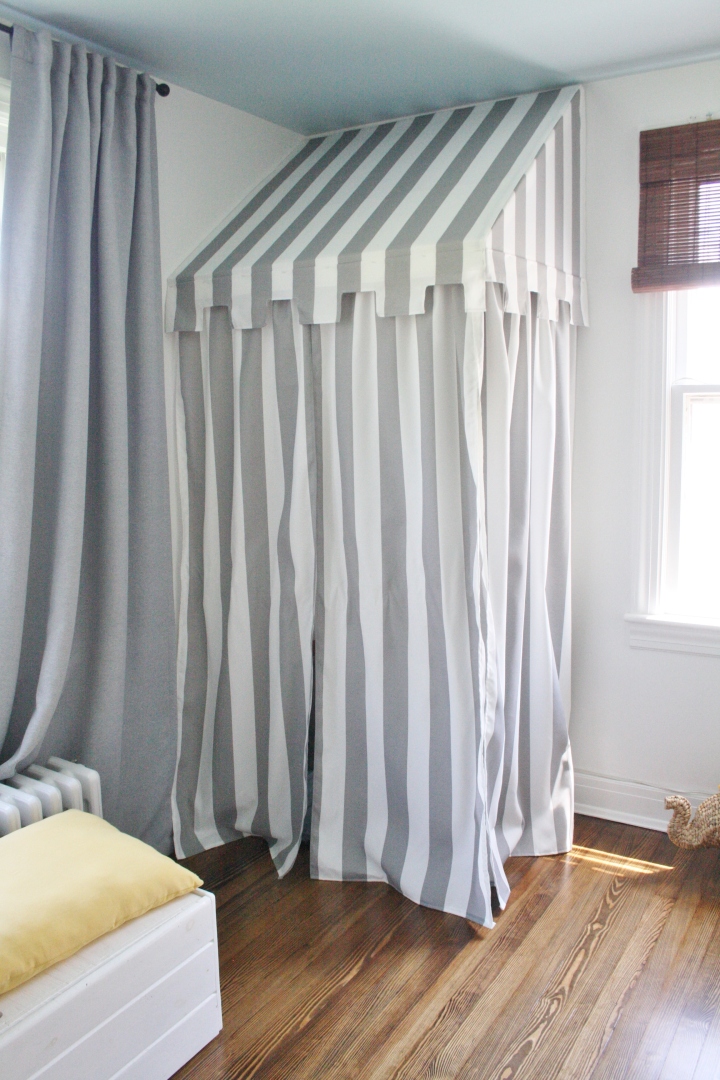
Next up was making the curtains, which were relatively easy. I just cut big rectangles and hemmed them, stapling them to the inside of the frame. I went back and forth on how to attach these curtains, and while I regret that I can’t throw them in the washing machine (I’ll have to hand wash them in place and then steam them dry), just attaching them with a ton of staples seemed like the sturdiest option.
As for the valance, I don’t have any photos of making that because I was cursing myself for not hiring a seamstress! That was not an easy job and it definitely doesn’t look perfect. I used trial and error to figure out the exact size of the rectangles, and then erred a bit larger when I cut them out. I did a little snip in the corners and stitched a narrow hem to keep the shape crisp. (I have since realized that a professional would have cut a front and back side and stitched them together inside out, which would have created a much more substantial/crisp end result.) To attach the valance I pressed the top over and then stapled it on (painting the staples in the white stripes afterwards).
And, here is the finished product! I’m really happy with the results, despite not being a professional seamstress! And the kids love it, which is what really matters. We always read books in there, the boys watch their IPads in there, the dog naps in there, I hide there for a few minutes of peace – we’re all winning here!


And, a before and after:
What do you think? Would you build one of these in your kids’ playroom?

