
I’m so excited to share that I will be taking part in the Spring 2018 One Room Challenge as a guest participant!
If you’re not familiar, the One Room Challenge, created by Linda of Calling it Home in 2011, is a biannual event in which 20 featured designers chosen by the One Room Challenge team each work to overhaul one room in 6 weeks. Along the way, the featured participants post updates each Wednesday detailing their process and updating readers on their progress. It’s SO much fun to follow along — I have been watching since the beginning and I always look forward to it.
In addition to the featured designers, anyone with a blog is free to take part as a guest participant and link their progress up to the One Room Challenge site. That’s what I’ll be doing!
I chose to makeover Graham and Harrison’s playroom. When we first moved in, this room was Harrison’s bedroom. About two months ago, I finally put the boys together in one room (something I’ve wanted to do since Harrison was born) and put all the toys in a single place. This has already been amazing for keeping the house neat and keeping the kids on task (in this room we play/keep the toys, in this room we sleep/keep the clothes).
But the playroom is really an eyesore, which is a shame for a room the kids (and I) spend a lot of time in! Plus, it’s a huge missed opportunity, since kid’s spaces are such a great chance to try out something whimsical and fun with design.
This is how it looks currently. I’ll detail what’s working and what’s not:

As you can see, the kids have a lot of fun in there just the way it is. This makeover will be more about adding function and beauty so that Mom also enjoys it and we can all keep it clean.

I’ll probably be moving some of the larger toys into the closet when they are not being used. Part of this makeover will involve de-cluttering both the closet and the room, as there are a lot of baby gear (closet) and baby toys taking up much needed space!
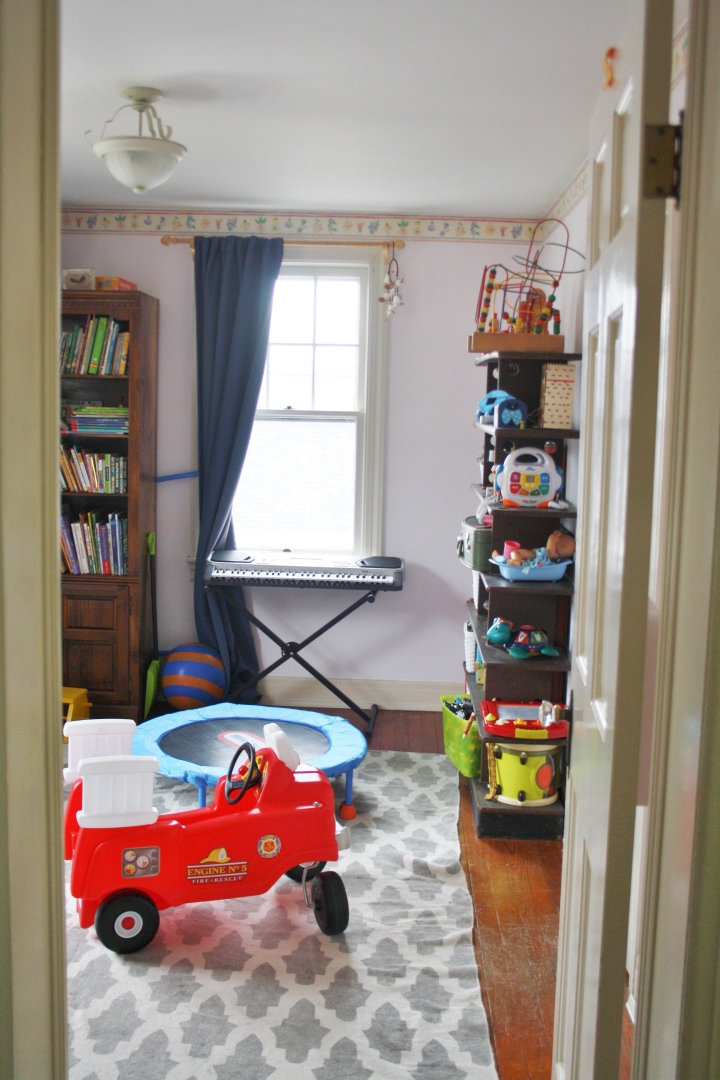
Obviously the wallpaper border, lavender walls and yellow-beige trim are going to be gone. I really want a clean slate that won’t compete with all the bright toys and books.

The rug will likely stay because it’s pretty, simple, and it’s an inexpensive flatweave so if a sippy cup spills, I’m not going to cry. I’m not sure if I’m going to keep the toybox in there. If I do, I will make a cushion for the top for adults to sit on.
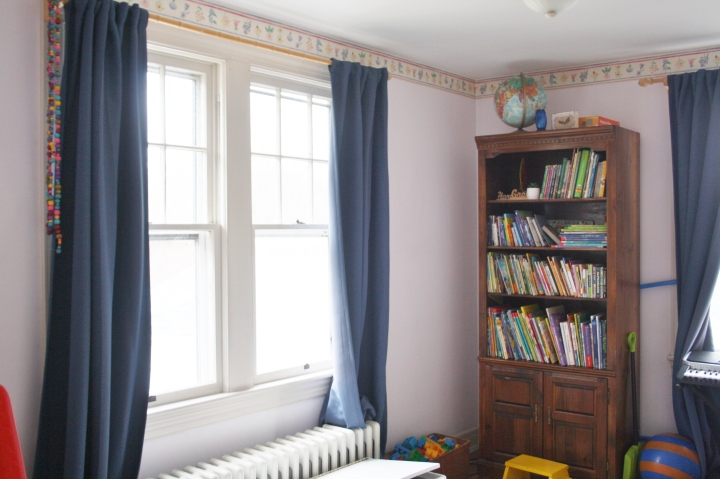
The curtains will be going in lieu of something lighter, and I’ll probably add roman shades.

Roman shades with curtains just for added warmth will be more functional here, as the curtains have to pass behind the radiator (not ideal for everyday use).

I think I will repurpose this bookshelf in my room for shoe storage and build in bookshelves on the right side of the single window.
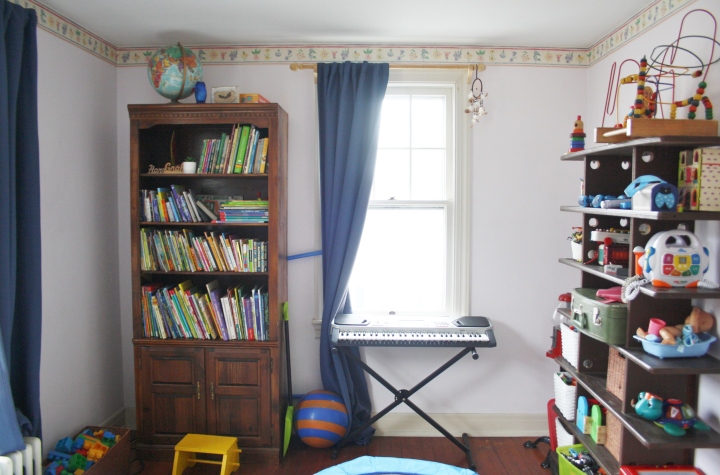
Where the bookshelf is now, I want to add something really fun – a built in tent/reading corner for the kids. I think it will be a great statement in the room, and every kid loves a tent.

This shelving unit was literally in someone’s barn and smells faintly of motor oil (don’t worry, I’ve thoroughly cleaned it!). I am still going to use it though because I love the shape and it’s actually really functional. It’s going to get a fresh paint job and new baskets and be moved to the other side of the room.
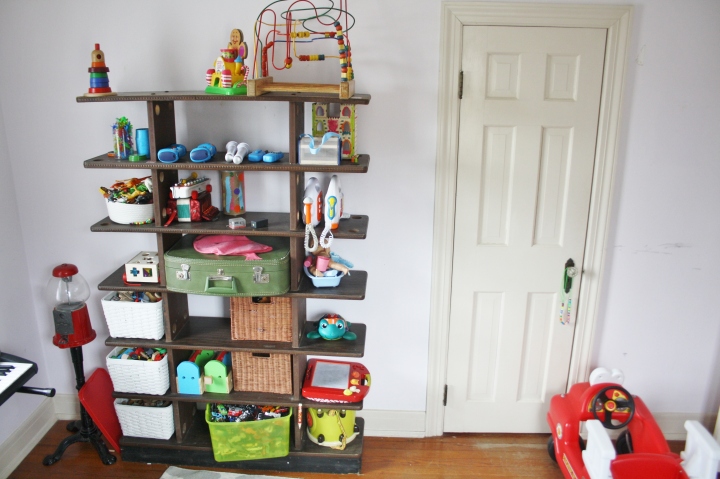

This is the door to the hallway. The open shelving unit in the photo above will move to this wall. That easel will probably be stored in the closet when it is not in use, as will the teepee.


I’m going to build the keyboard its own shelf where the shelving unit is now, with storage for all the kid’s instruments in a little musical nook.

This corner is kind of useless and I might just get a big piece of beautiful art for the kids to stare at and hopefully become super creative and smart.

Graham requested a blue playroom and I’m thinking of using blue on the ceiling! I’ve been wanting to do a non-white ceiling for a while now and the playroom seems like the perfect no-pressure place to start.

And, obviously a new light fixture is in order. This room has standard 8 foot ceilings and balls are thrown in here, so I need to find a great flushmount or semi-flushmount that is not too delicate.
Here are some inspiration photos I’ve been collecting.
I think it looks great when bright toys are against a white background. I love design that makes the things that HAVE to be in the space look intentional and beautiful.


Even though the primary colors in the toys will take center stage, I want the base of the room to remain neutral and a little more grown up. Enter woven wood tones and elegant printed fabrics in grays to coordinate with the rug.


A fun ceiling in a kid’s room is something that I have wanted to do for a long time.
I originally wanted a tented ceiling, because they are the perfect mix of extremely elegant but really fun.

But I quickly realized that 8 foot ceilings that end 4 inches above the tops of the windows don’t lend themselves to tenting.
Then I briefly considered a faux tented ceiling like so, but quickly nixed that because I don’t want a broken neck and I know how difficult stripes are to paint over (not trying to sand the edges of every one of those when the kids are sick of the stripes someday).


So I settled for painting the ceiling, which I think will look really fun and cheerful.


And to get that tented look, I decided to just build a striped tent with greek key trim!

Greek key trim ^

The tent will be made with a really large awning like so ^

It will look kind of like this ^

And kind of like this ^
And that’s all I have for now!
Next week I’ll share a mood board and some progress photos. Be sure to follow me on Instagram as I’ll definitely be sharing progress on Instagram stories every day.
Check out the other guest participants here:
And the 20 amazing featured designers here.

Love the direction you’re taking this project! I’m doing a playroom too. So true that it’s a perfect space to experiment with fun, whimsical design! I can’t wait to see the painted ceiling. I’ve always wanted to do one too but haven’t yet bitten the bullet.
Happy decorating!
What a great playroom and beautiful inspiration photos. Good Luck! Going to be a great season.