
Danascara has gone through a lot of changes over the years. Some are welcome additions – closets added, indoor plumbing, a large kitchen, a poured concrete basement, and many structural supports that have kept the house strong well past its 200th birthday.
But some of the changes weren’t the best fit for the house – and no criticism toward those who made the decisions – sometimes it’s difficult to separate necessary updates from trend-driven decisions when renovating an old home.
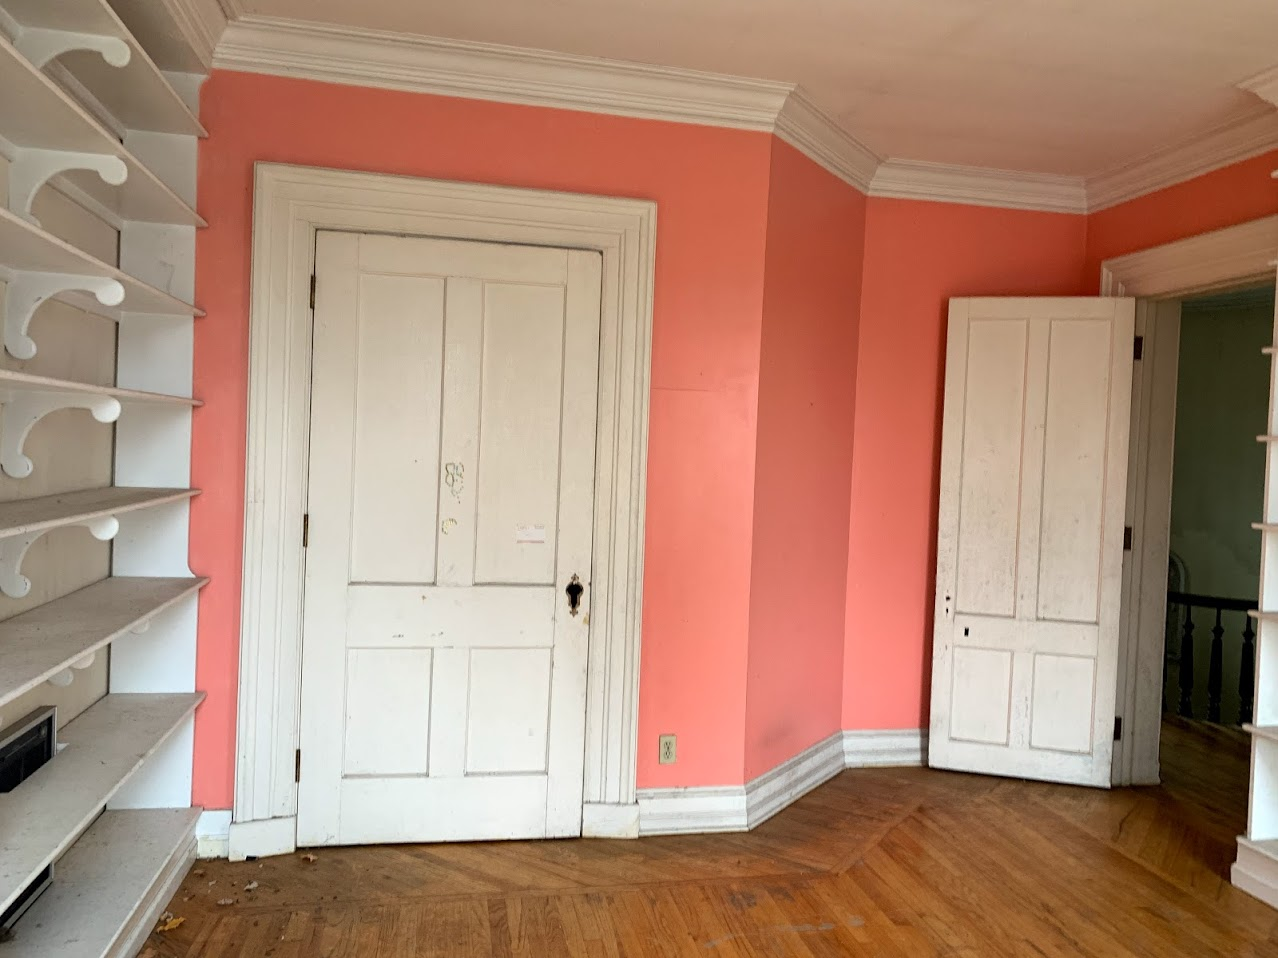
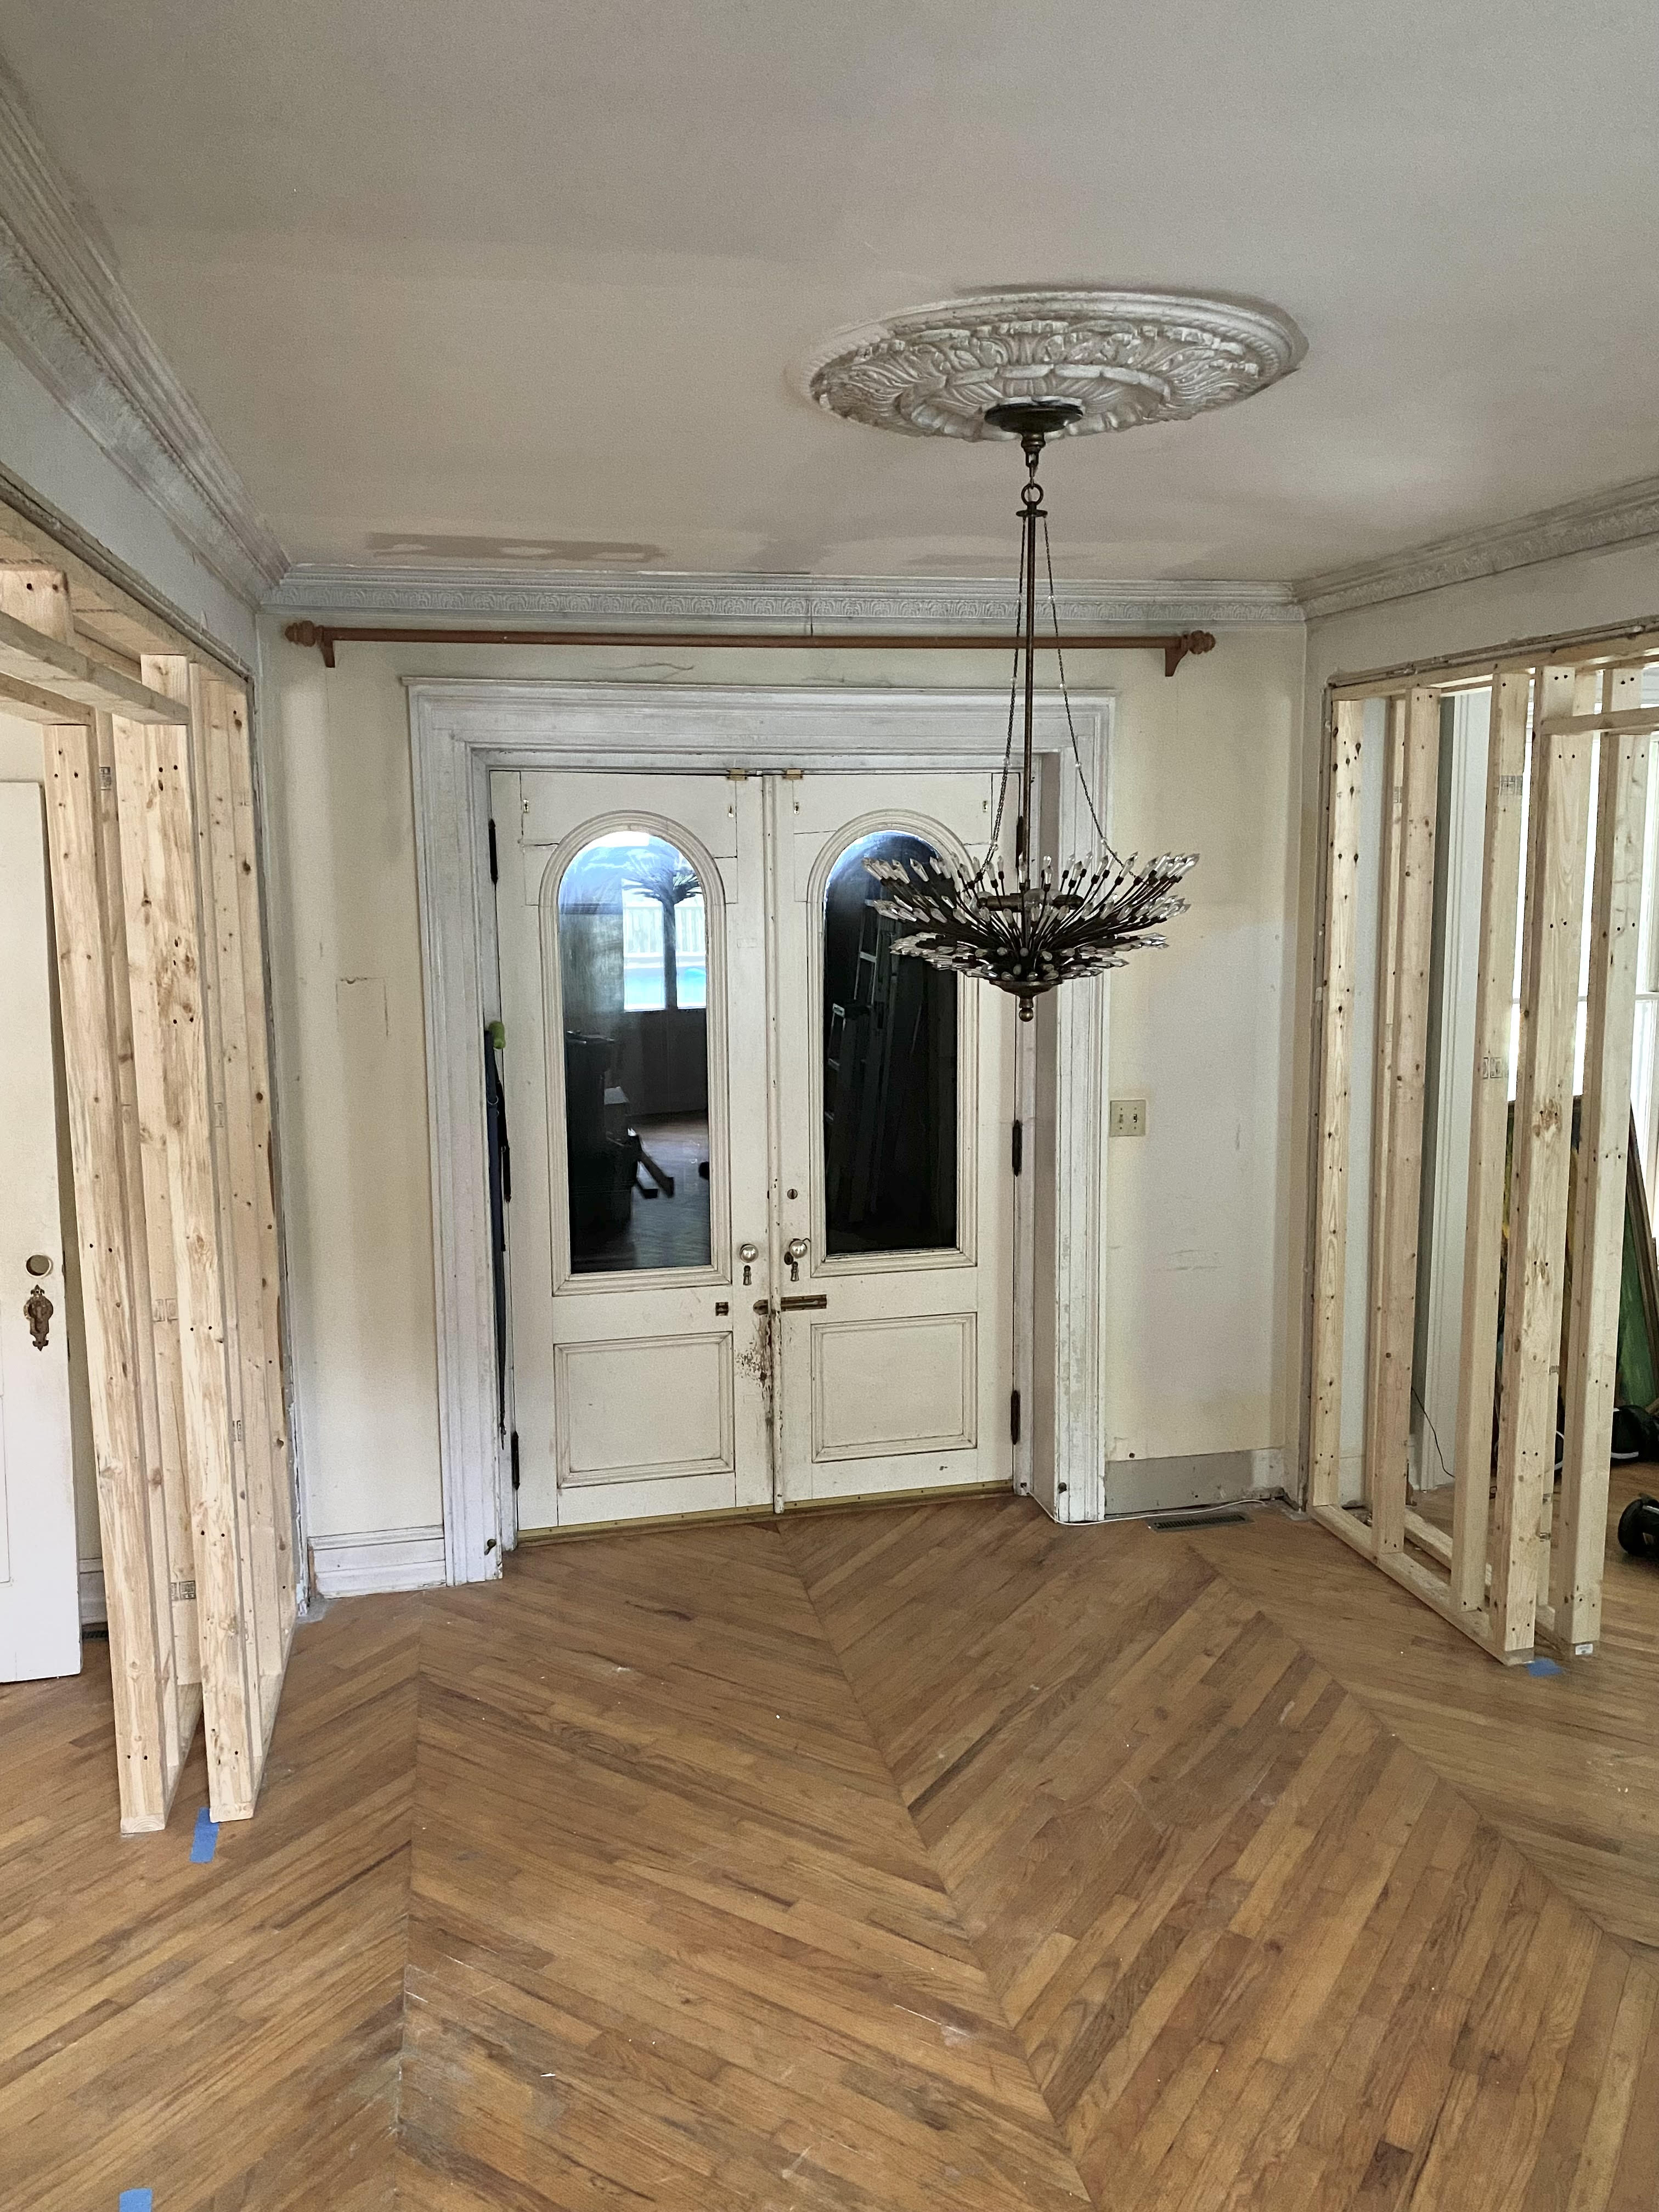
The change that has bothered me the most was the open concept in the downstairs. At some point, the living room, foyer, and dining room were thrown wide to each other with large uncased openings between the rooms, essentially creating a cavernous 42 + feet of connected living space with too many different functions to make it feel right. Some houses and spaces aren’t meant to be open concept, and this was one of them.
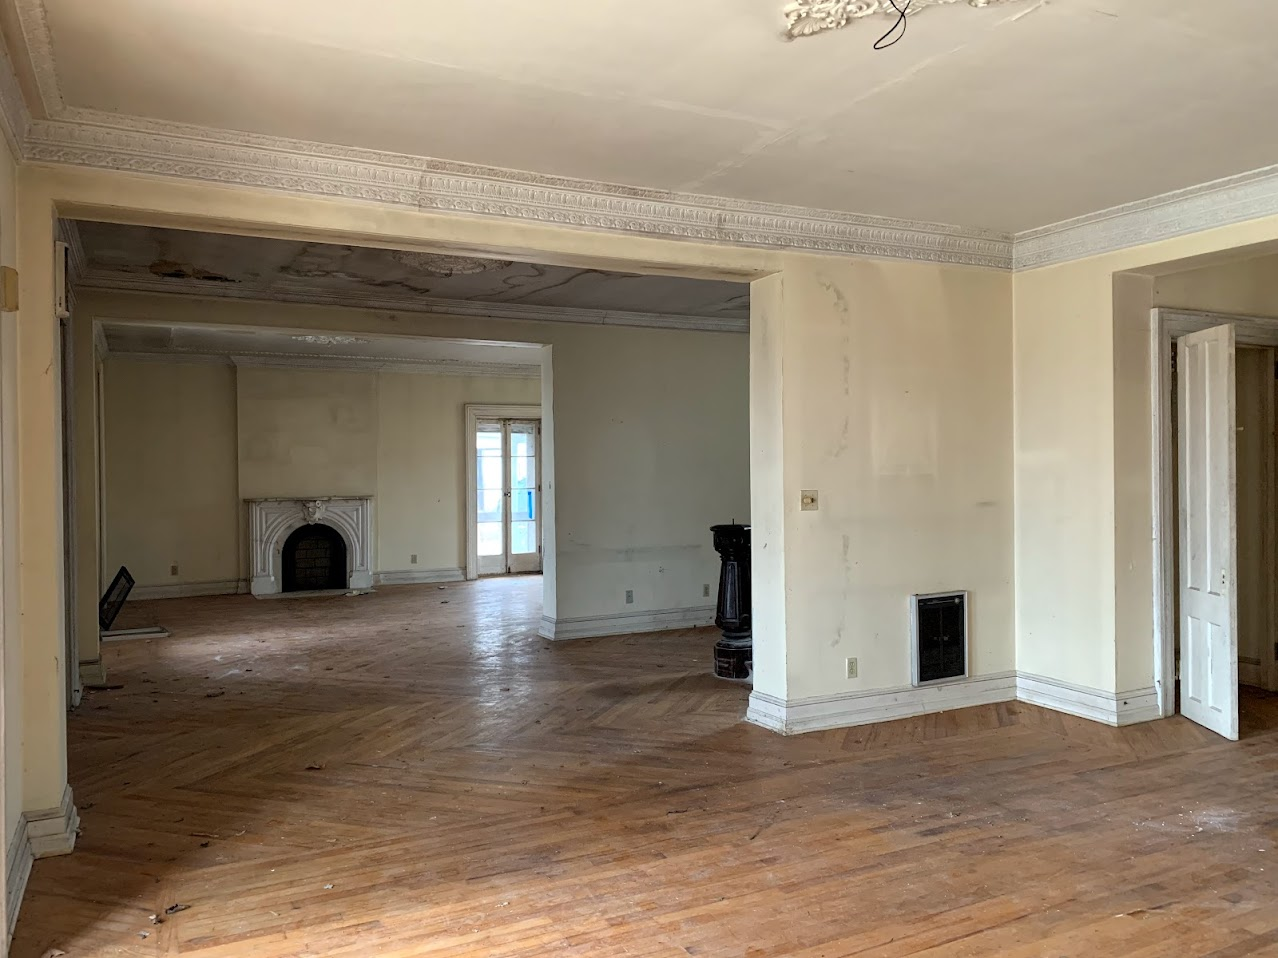
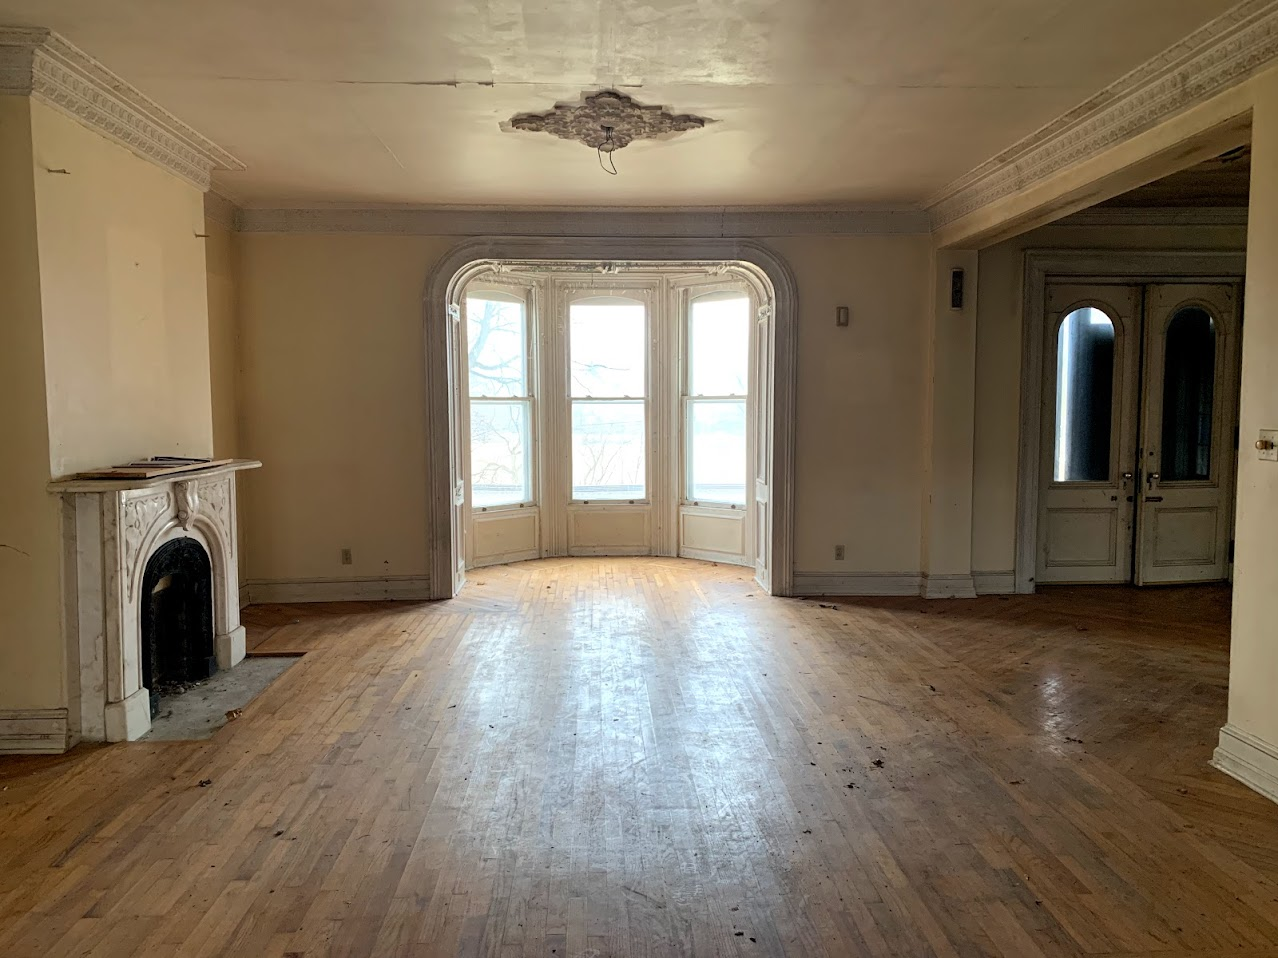
I’ve known for a while that I wanted to make the openings smaller but I debated how I wanted to design those openings – should we do a paneled arch like the one around the bay window in the dining room? French doors?
This spring, I found my answer. Two women who lived in the farmhouse next door when they were children reached out to me. One had actually written a book about Danascara and her life growing up on a farm. They came over for a chat and were able to tell me so many details about what Danascara looked like when the original owners sold it. It sat vacant for a while before new owners lived in it, and they used to come over and play in the empty house!
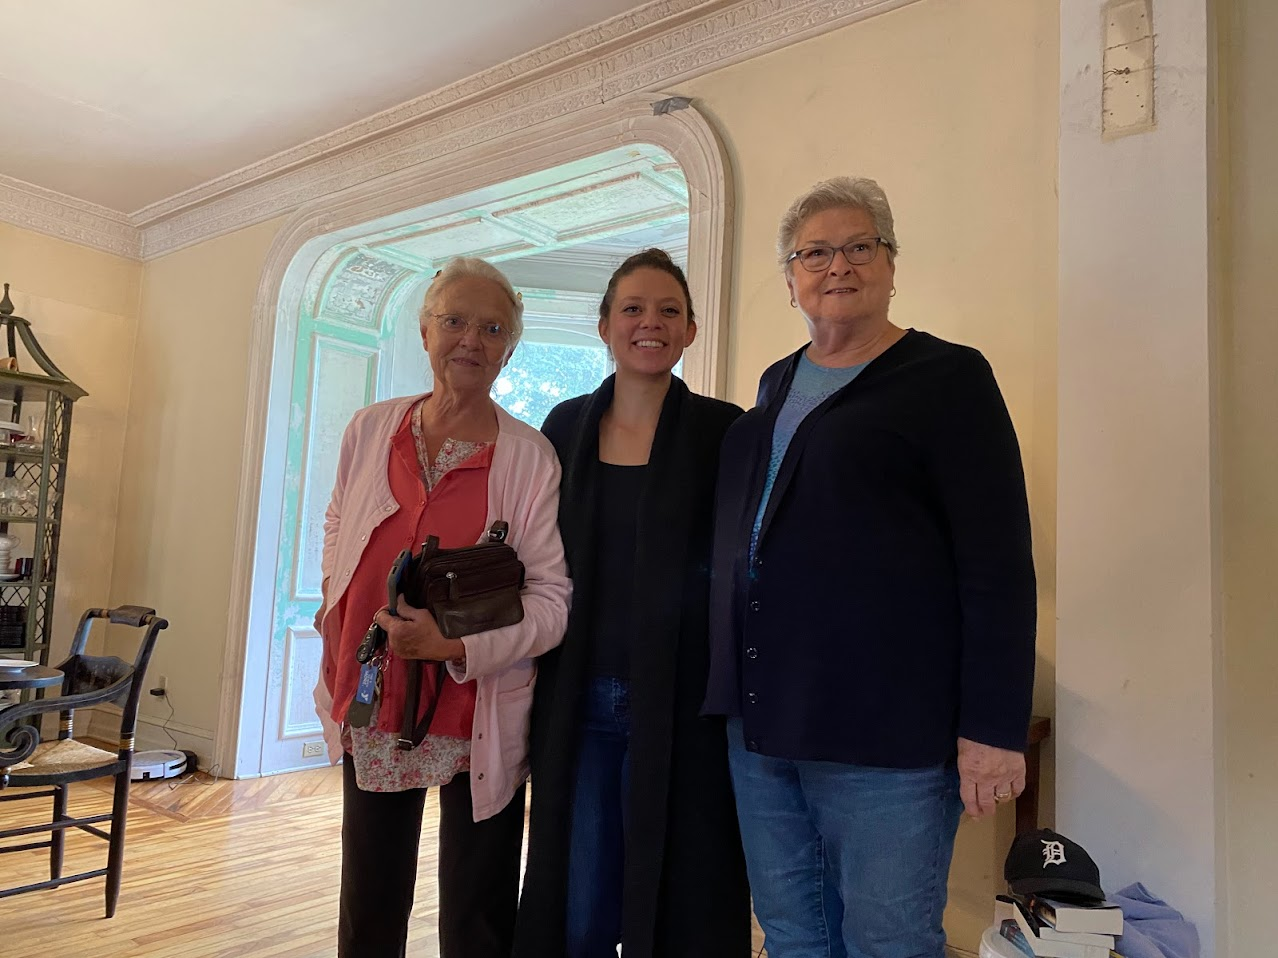
Our chat gave me so many gems about this home’s history, but perhaps the best information was that there used to be two sets of big pocket doors between the dining room, foyer, and living room.
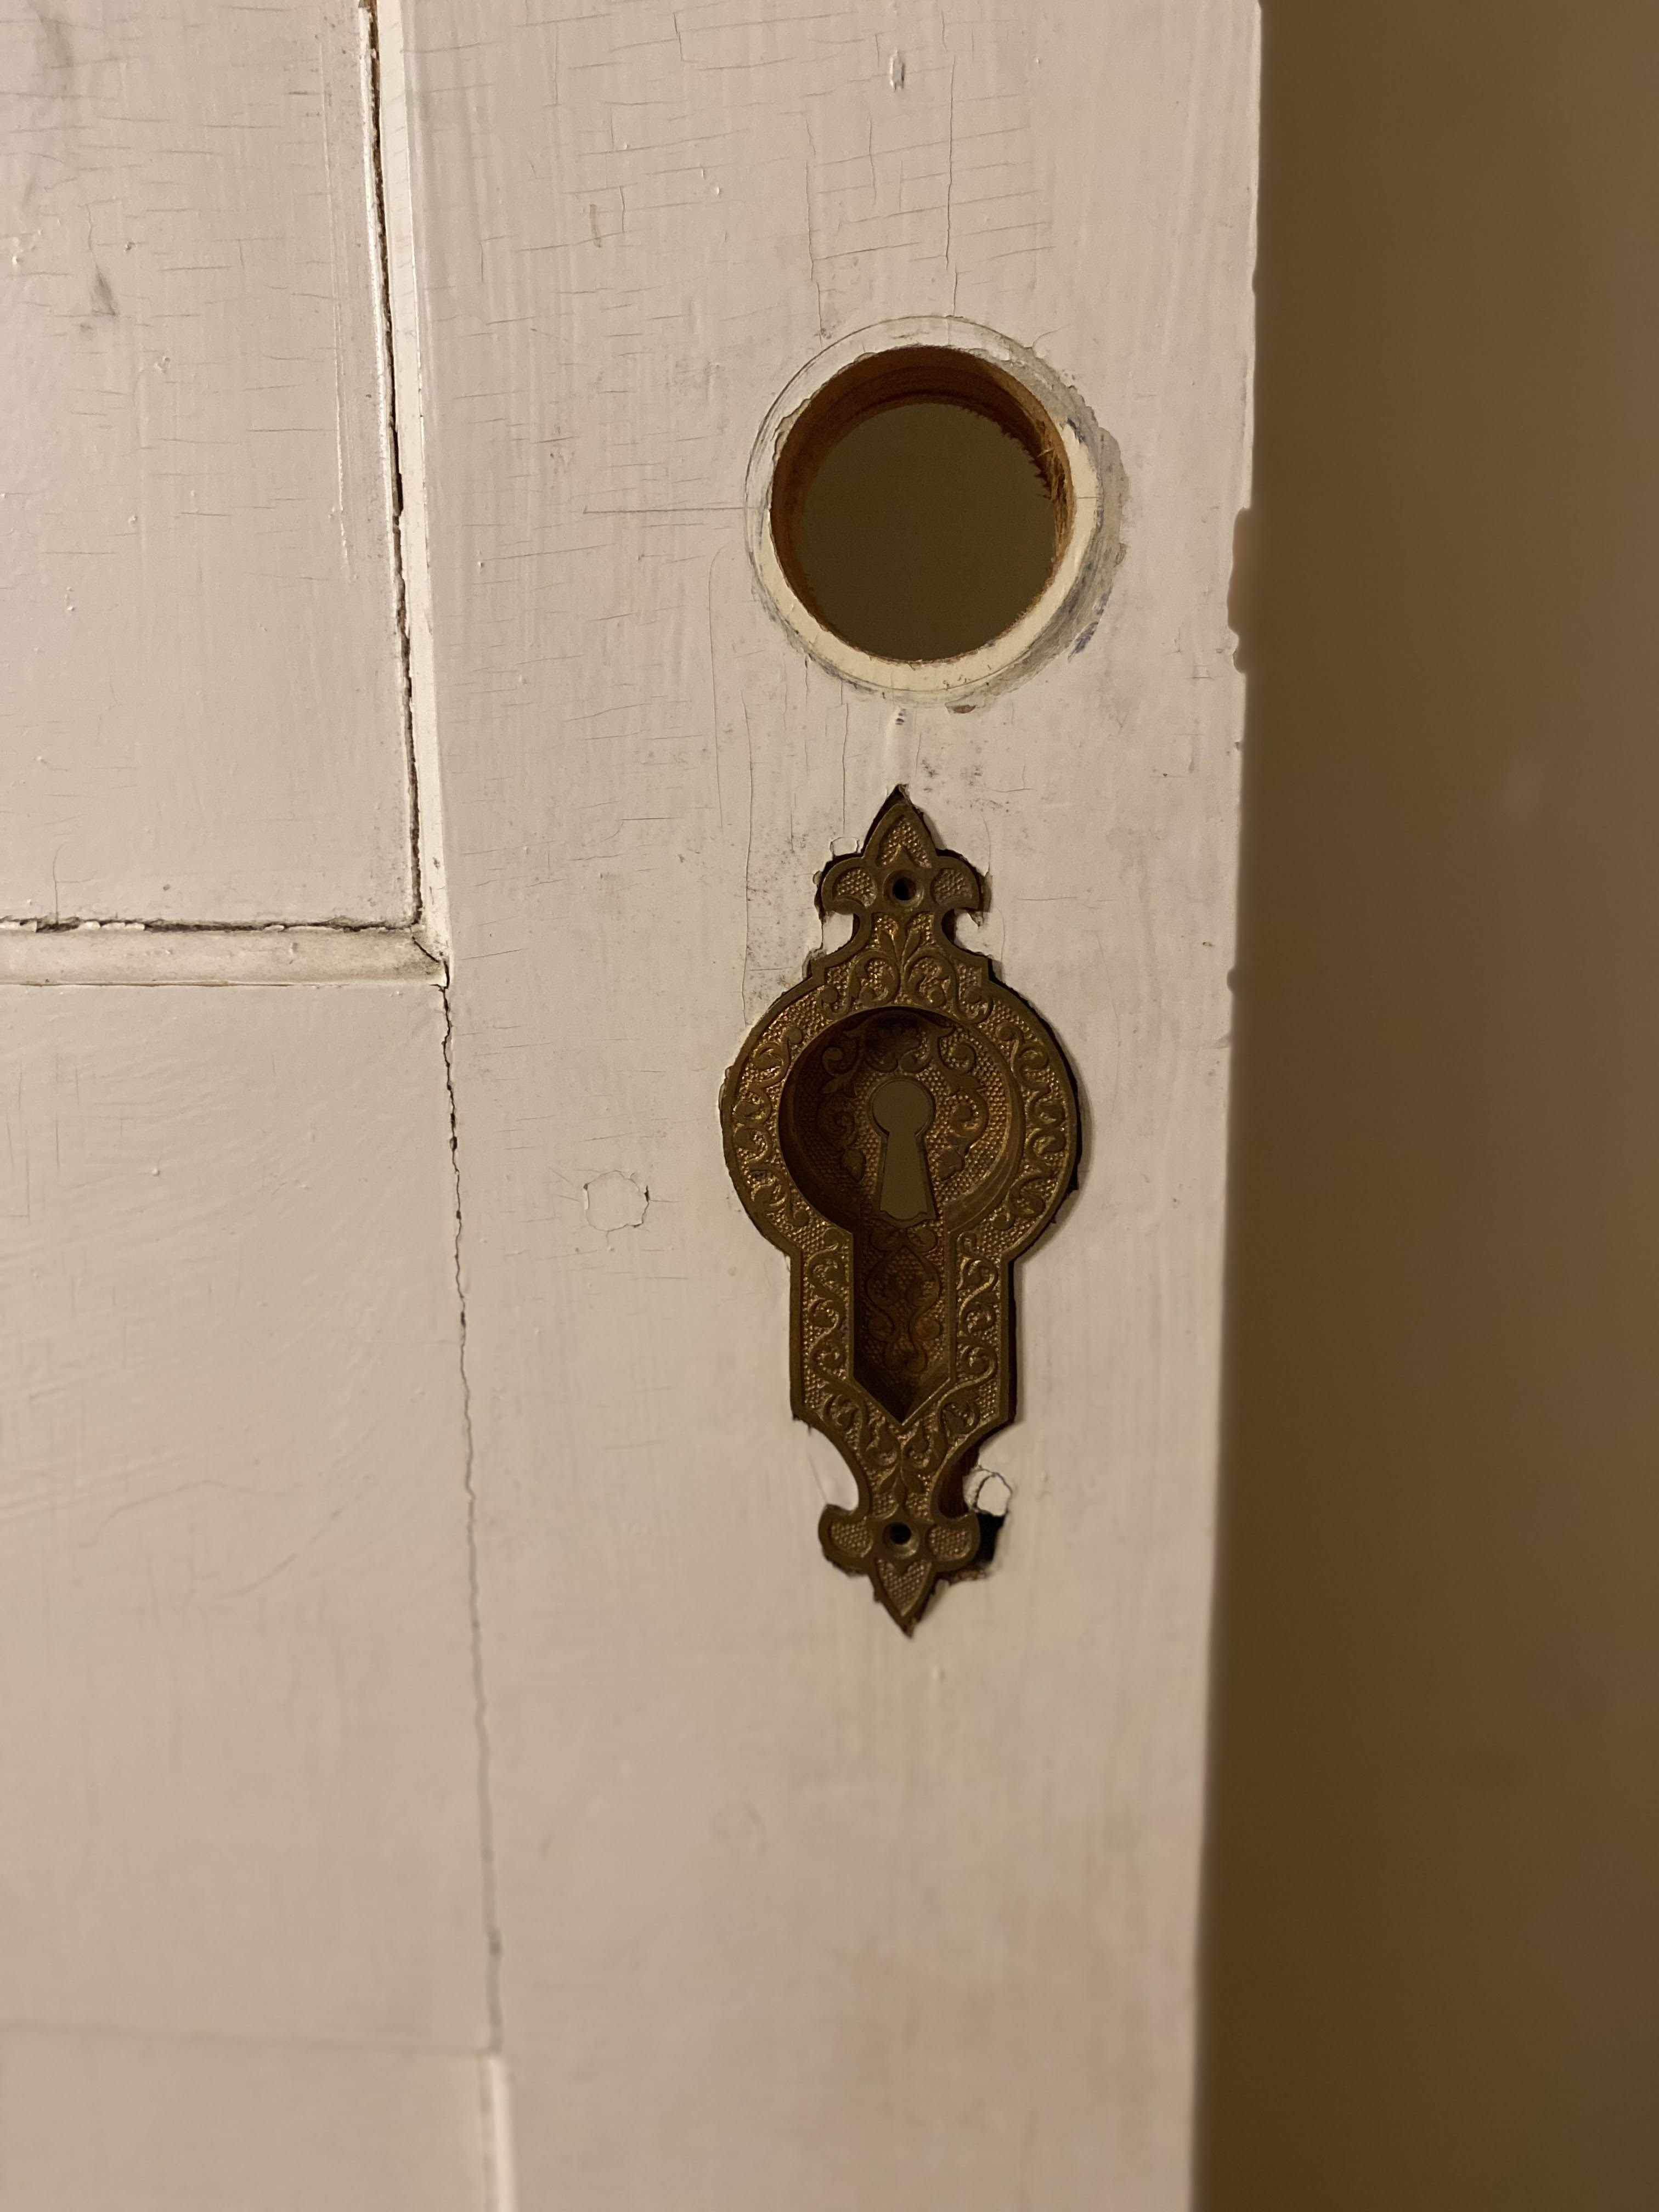
That night, I sat thinking about our conversation, and had a lightbulb moment: the pocket doors had been repurposed for our closet doors!
When we bought our house, much of the hardware had been stolen when it had been abandoned, but in old listing photos I had seen that our (overly large) closet doors had detailed, recessed hardware on them, and above that someone had drilled in to add traditional door handles. Well that recessed hardware was pocket door hardware! I ran upstairs to measure those closet doors and they were all the same exact size – they were the four original pocket doors!
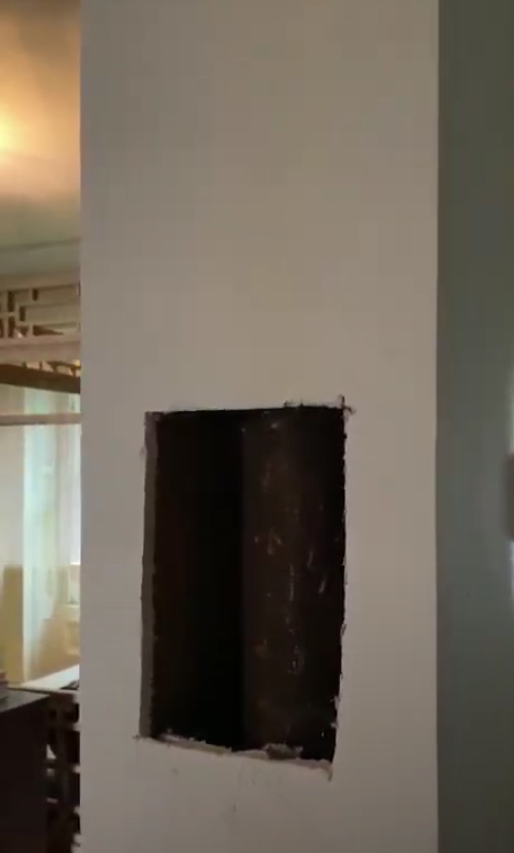
Of course I had to cut open the walls downstairs to see if we could put the pocket doors back! Spoiler: we couldn’t.
When the house was renovated in the 1980s, huge steel beams were put in on either side of the foyer, underneath the tower section of the house, to square up major sagging. In the walls where the pocket doors had been there are now steel supports that hold up those beams. Not something we could move or would want to move at this point!
So I changed course and decided that we would still put the pocket doors back, but as double doors between the rooms instead.
Yesterday we completed the first step in that process: framing the doorways!
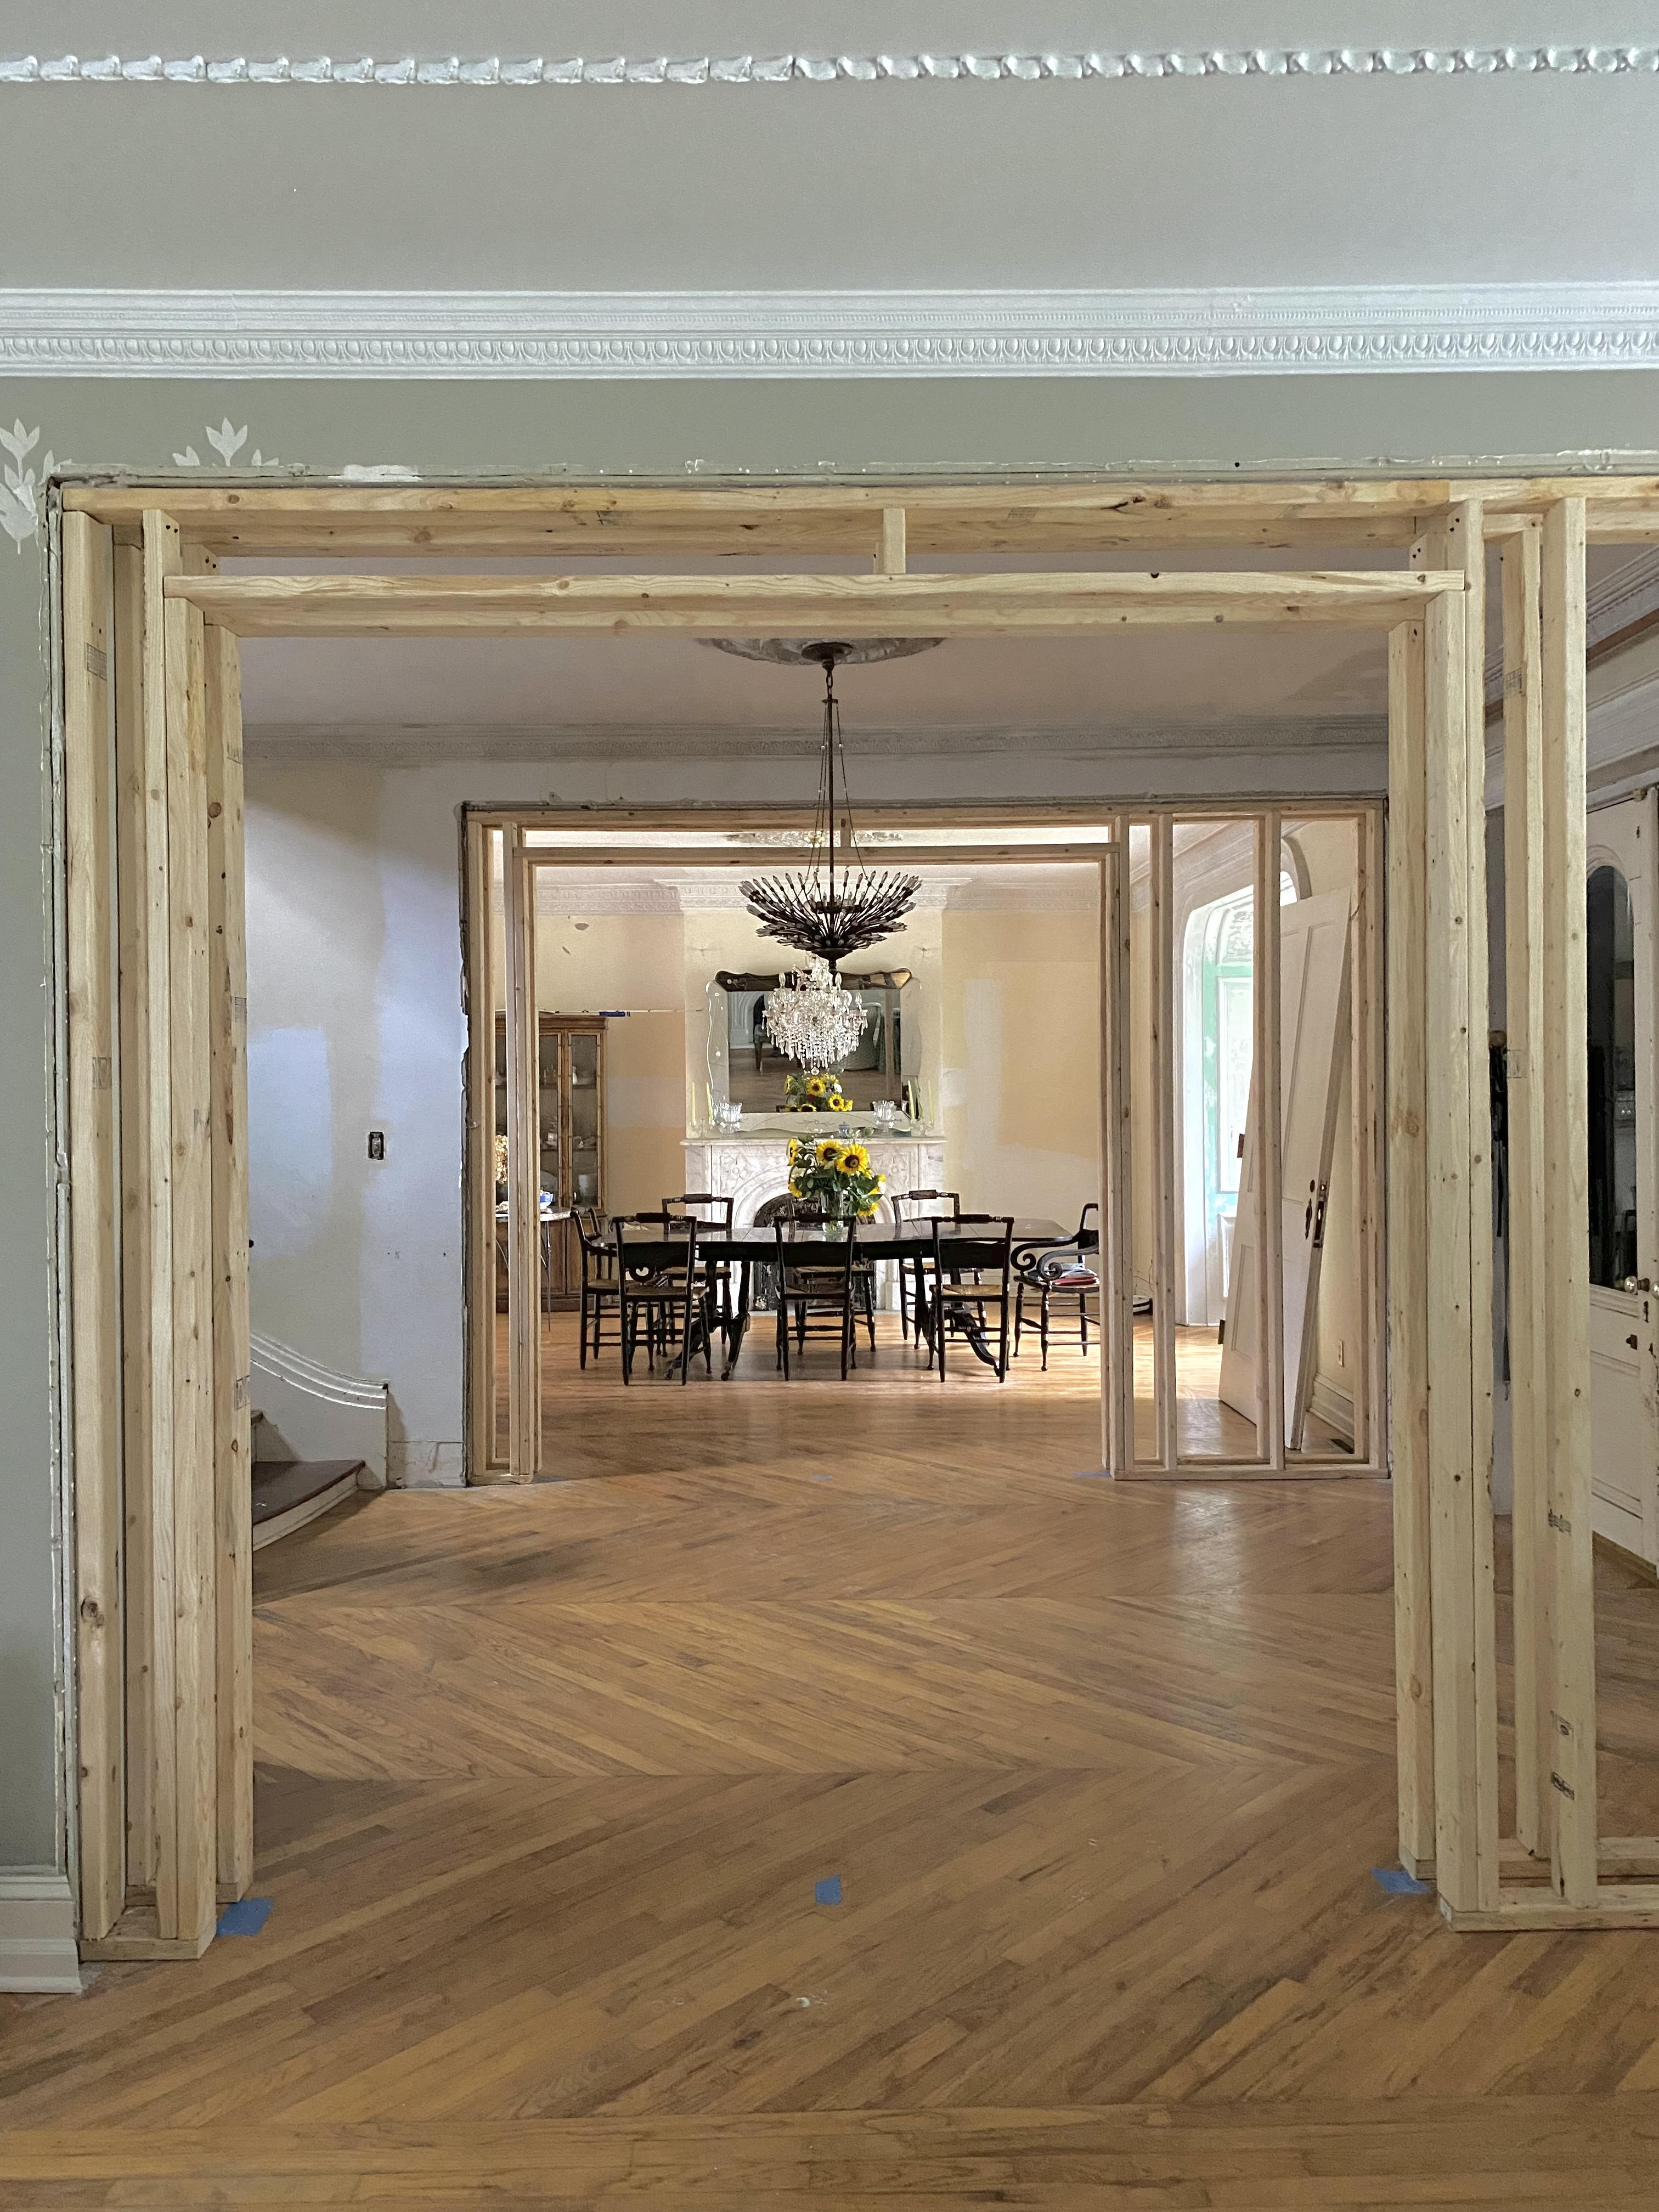
My dad, my brother Rocco, and my husband worked hard to get these doorways perfectly plumb and level so the process of hanging the doors will be a little easier.
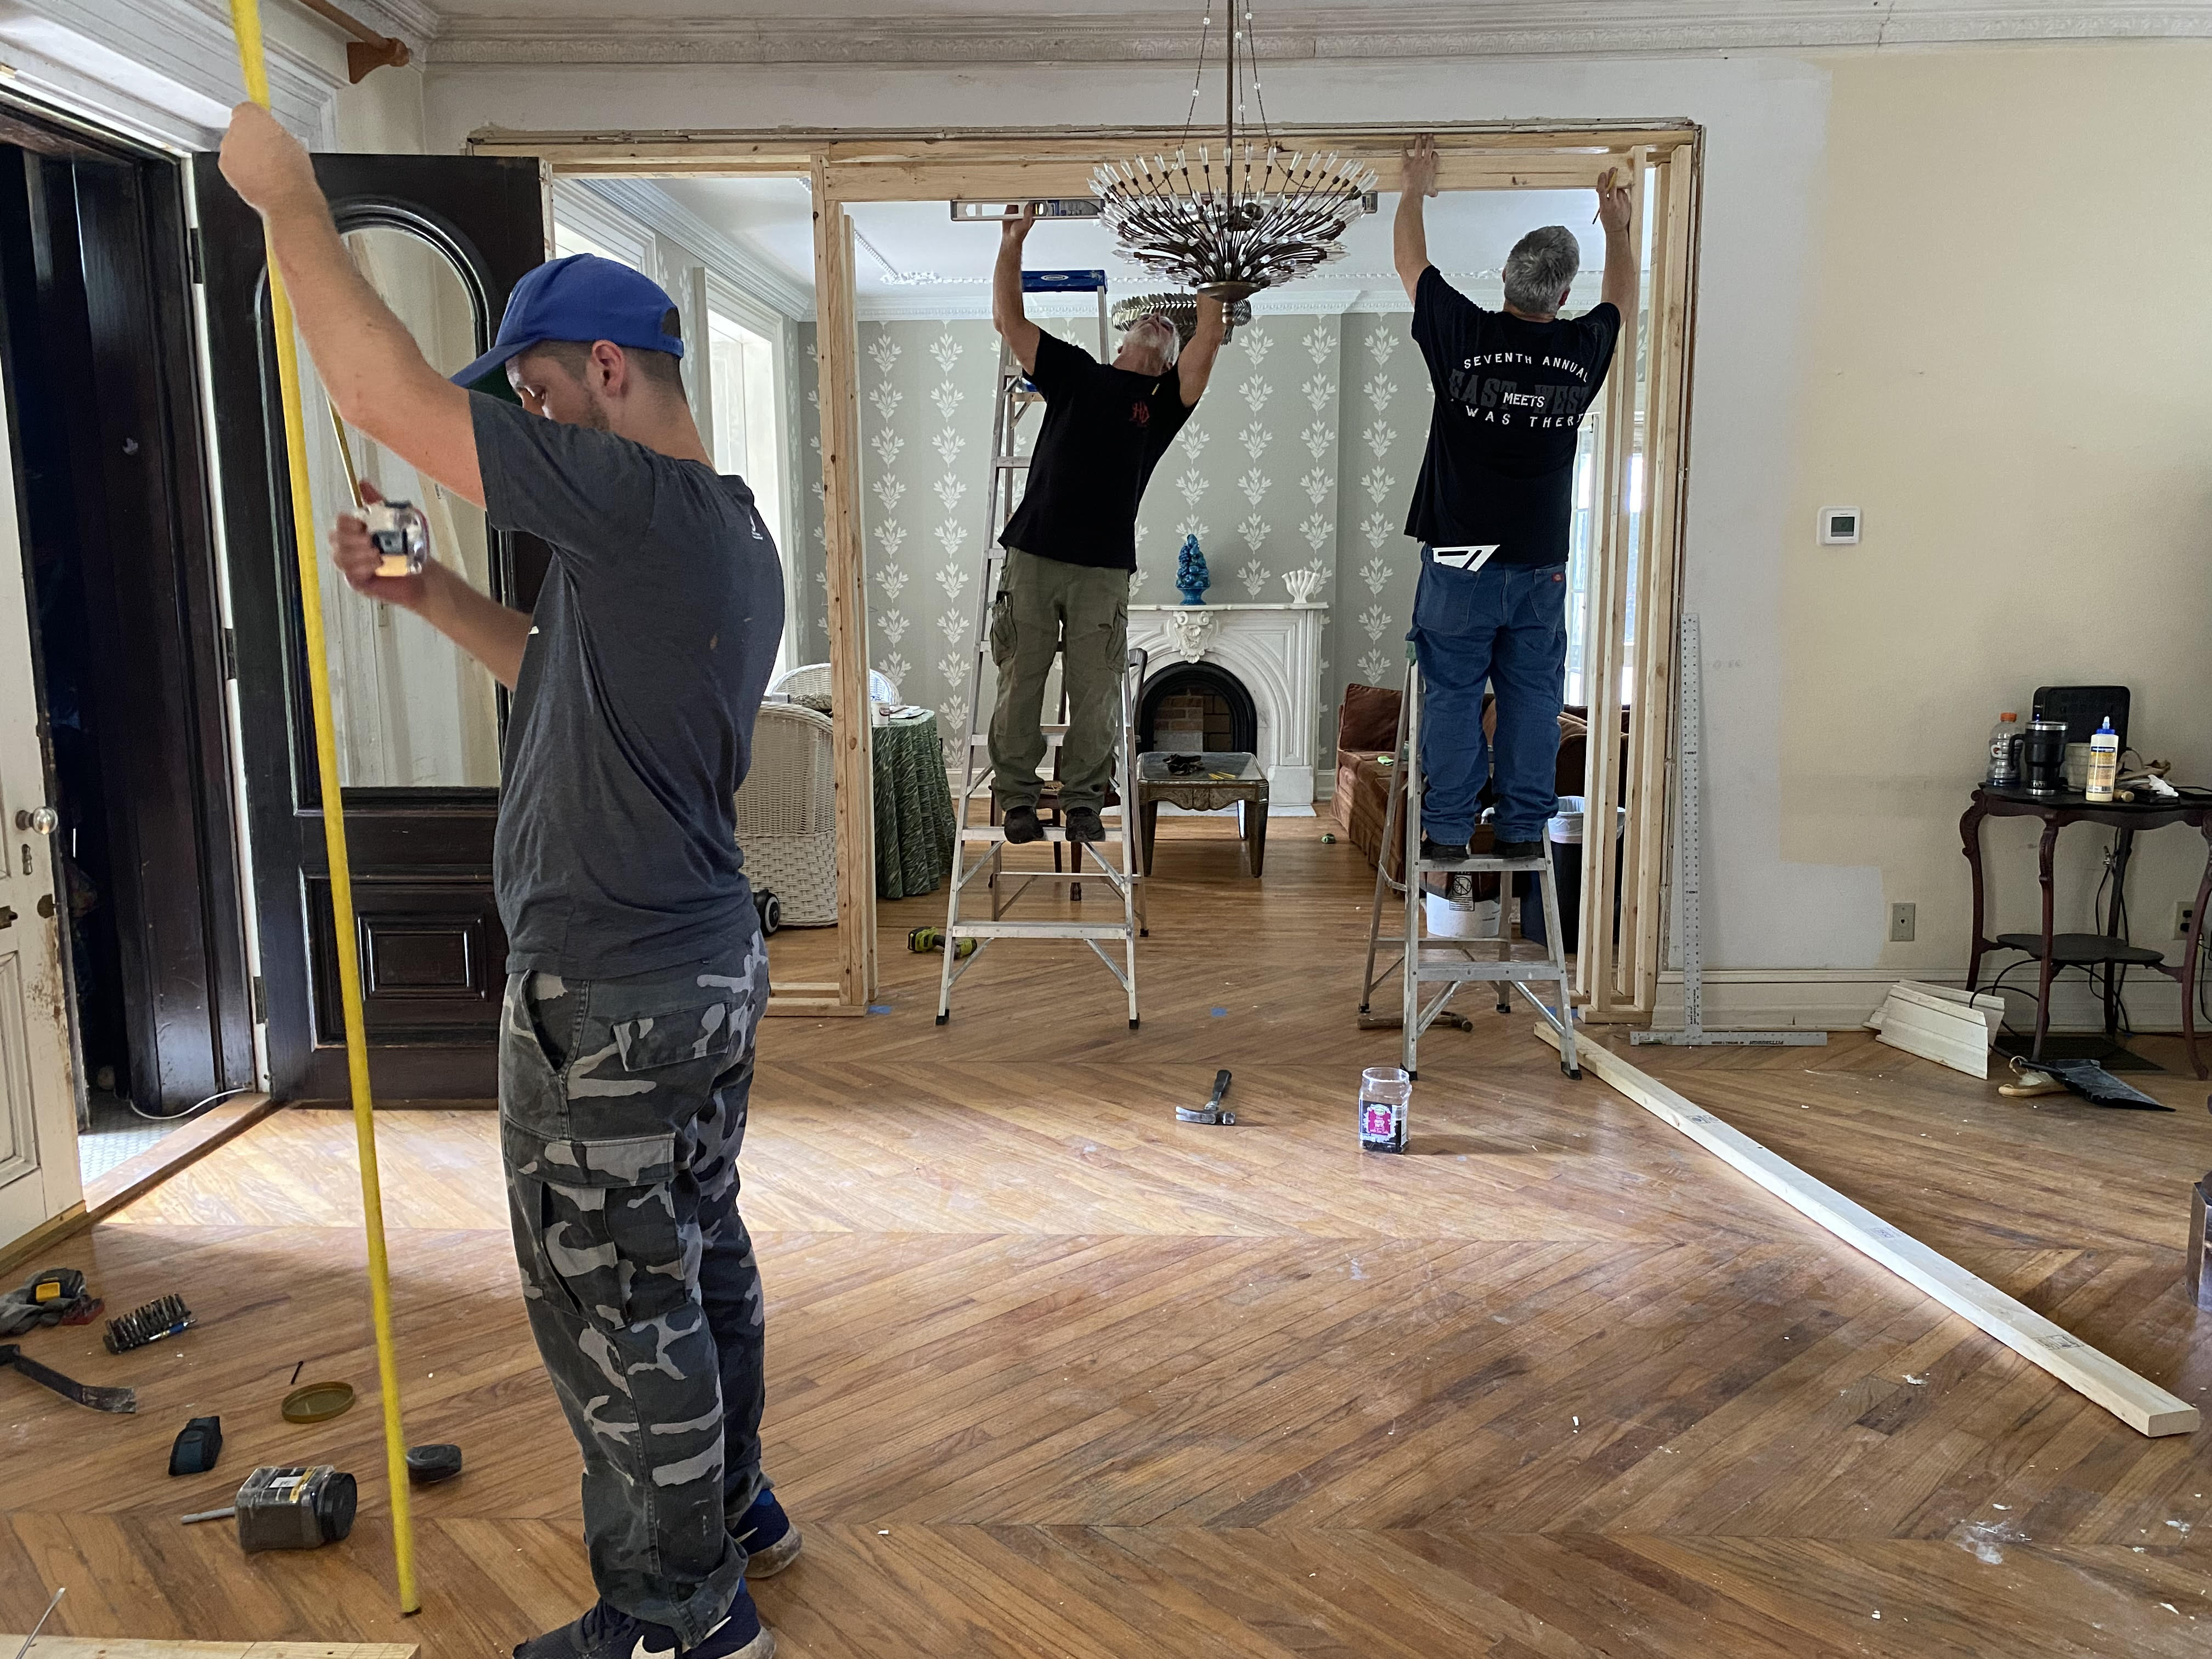
My dad also convinced me that we should add an outlet and a sconce on the foyer side of each wall.
The next steps are to add that electrical, insulate between the studs, add drywall, tape and mud.
It feels really good to restore this part of the house to very close to what it once was!
Our trusty helpers will come back to help us hang the doors – a tricky process. Stay tuned for updates!

I like the job so far. I agree about doors into parlor and dining room. Open concept isn’t for old historic homes especially when the rooms are large enough already.
💖💖💖
I have commented before to let you know how wonderful it is to see Danascara and the immediate area around your house. I grew up “on top of the hill” from your home. I love seeing all you have done while restoring your place and was absolutely thrilled to see the picture of Heather and Elizabeth when they came to see the house. Heather was my childhood friend and I used to walk to her farm (passing by your house) on the way “down the hill” to play. In fact, your neighbor next door is my sister’s friend. Love what you and your husband are doing to restore that grand old house. Your instagram pictures and stories keep me up to date. We don’t come up to Fonda very often, but will be up for a cousin get together and to see the fall leaves in October. Keep on posting your pictures and stories. I love seeing them.
Bonnie Bartholomew
Thank you so much for your sweet comment, Bonnie! It means a lot that people who have known and loved Danascara for years are watching along as we restore and care for her.