Now that the work included in our renovation loan is finished, it’s time for us to take stock of what we need to do to *actually* finish all the unfinished rooms. The work included in the renovation loan — aka the first phase of the renovation — was only meant to make the house livable, and livable definitely doesn’t mean finished or pretty!
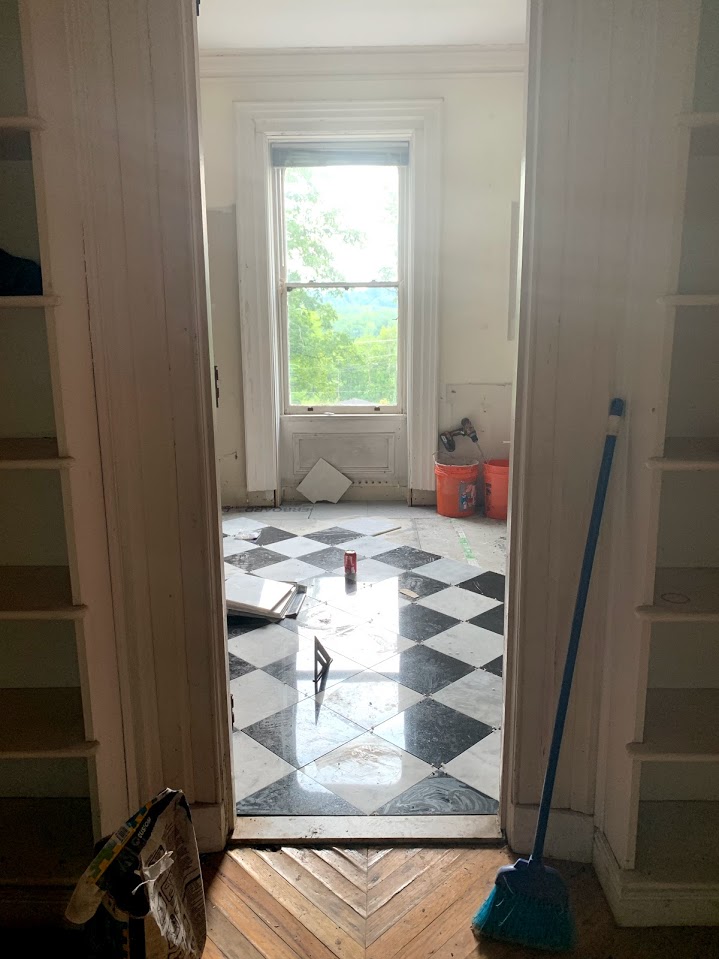
This was the state of the upstairs bathroom when we first bought the house:


There was nothing salvageable in the room, which had last been renovated in the 1980s. The house had been abandoned for 8 years and it was obvious. The tub looked like it was being held together by plastic and duct tape, the toilet was not fit for viewing, and the floor tiles were rattling around like loose teeth. The ceiling of the foyer below was covered in mildew that we suspected had come from a leak in the bathroom pipes. The two other bathrooms (a half bathroom downstairs and a full master bathroom) weren’t in much better shape, but we knew we couldn’t gut them all at once — it wouldn’t fit in the budget, and if we made it fit, we would have to compromise on finishes and rush the design. So we decided to renovate just this large bathroom, which would be more than enough for our family of four until we got to the others.
In planning this bathroom, I knew I wanted the pieces to have a feeling of history, without being derivative of a specific time period. I knew I wanted a claw foot tub, which was easy to find (super easy in our case as my mother-in-law had one in her garage for almost a decade). For a vanity, I was picky. Most vanities look pretty modern, and I really wanted a piece in a dark, solid wood, which I couldn’t find anywhere. I had seen people re-purpose old dressers or buffets as bathroom vanities — I don’t always love the execution of these, but I knew the idea had potential and I wanted to try it myself.
For the floor, I wanted a pattern that was technically classic in a graphic black and white color scheme that would make it feel more modern. I think House of Brinson’s floor in their powder bathroom originally inspired this idea for me — the tumbling blocks pattern feels really modern but it’s actually an ancient pattern. These are all ideas for the floor that I considered.

This gorgeous floor by @Renovate108.

I considered classic hex tiles in a black and white design, but I still wanted something a bit more large-scale and graphic.


I thought about using the smaller, uniform black and ivory tiles, the kind you see in Victorian entryways, or honed black and ivory stone squares that struck me as more French, but I couldn’t find any affordable versions that I liked.

This classic pattern was a finalist, but again, I couldn’t find any ready-made tiles with this shape. I would have had to ask my contractor to do a lot of math and complicated cuts, and we were going to be on a tight timeline, so I wanted to avoid that.

This was the pattern I was going to go with, using easily available polished marble and black granite 12×12 squares cut to size, right up until I brought the tile over to the house. As soon as I set the squares down in a diamond pattern to try it out, I knew that it was the right scale for the room. Plus, it lined up with the wood floor pattern outside the door. Sometimes you can plan forever, but you need the materials in the space to tell you what the right decision will be.


I’ve loved this classic black and white checkerboard pattern since I was a little girl. I remember seeing Gwen @The Makerista use it in her kitchen a few years ago and loving it. Diane Rath @therathproject had also done a checkerboard floor around the time I was planning this bathroom, and I loved how it fit so well with her more modern style. They both gave me the idea to use these ridiculously affordable marble and granite 12×12 tiles from Lowe’s.
When we first closed on the house we started some demo ourselves, pulling out the cupboards that were in there. Our contractors had it gutted in a day once they started work.


While the contractors worked on moving and replacing pipes, patching the walls, and tiling the floors, I worked on converting an old buffet into a vanity, and cleaning, painting and reglazing the old clawfoot tub.

I made some mistakes and learned a lot when trying to restore the finish on this buffet. Like, never use Restore-a-Finish if you’re ever going to poly it, and it’s really hard to match the finishes if you sand one part and not the other. Also, I reaffirmed for myself how much I hate poly, period! It’s so hard to get a clean, bubble, drip and dust free finish. I was able to match the finish of the top and the sides in the end, as you can see below, and while the poly finish on top is not perfect, I am still happy with the look of the vanity!

I learned a lot with the tub project as well! Some who follow me on Instagram might remember my worries when I learned that the old enamel finishes contain lead. I did a lot of research about it, and decided that the combination of an at-home epoxy kit to coat the inside and a stern warning to never drink the bath water (thank goodness my boys have pretty much grown out of that habit) would be safe (how many of us grew up bathing in these tubs?!). If needed, I will have a professional coat the inside, but for now, the at-home kit is holding up tremendously well.


I painted the outside with Rustoleum oil based primer and paint. My dad sandblasted the feet and I haven’t painted those yet. I’m still deciding on a color for the outside of the tub and the feet!


I originally wanted to put the tub in front of the window as the focal point of the room when you walked upstairs, but some time in to the renovation our contractor told us that wouldn’t be possible, because the section of the bathroom near the window is actually located over our unheated vestibule. We didn’t want to deal with frozen pipes during the winter, so we had to situate the tub along the side wall, with the pipes closer to the middle of the bathroom. The vanity then had to be placed opposite the tub, to the right of the window (we had originally planned to place it to the left of the door, but there wasn’t room with the tub also on that wall). That left the toilet in its original position with an empty space across from it and next to it that I planned to fill with furniture pieces for storage.
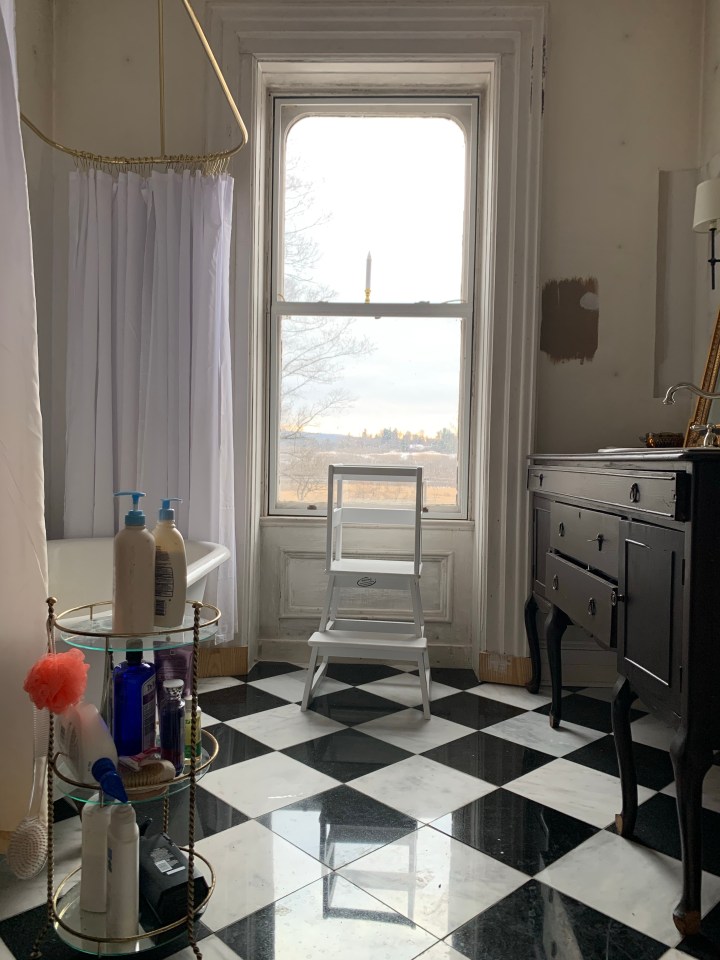
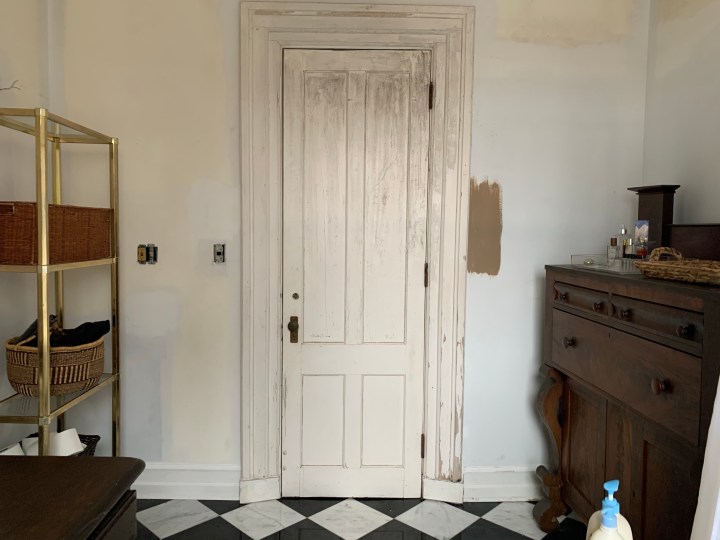
Here is how the bathroom looks now! It’s got potential, right? It just needs a little paint and some tweaking.


I made this list of what we need to do before I will consider this bathroom “finished” (in no particular order):
- New chandelier medallion
- New heating vent cover
- New exhaust fan vent cover
- Paint trim
- Paint walls
- Paint ceiling
- Make window treatment
- Make shower curtain
- Paint tub bottom and feet
- Install quarter round trim around bottom of window well
- Seal tile
- Caulk around plumbing holes
- Strip door
- Address door hardware
- Find pretty bottles to decant shower products in to, or just prettier shower products?
- Purchase a bath water strainer
- Install black GFCI outlets and push button switches, with brass plates
- Find two new sconces for next to mirror
- Hang mirror
- Find sconce for over etagere
- Find a chair for next to the tub that can double as a stool for the boys at the sink
- Finish the inside of the vanity where the drawers go around the plumbing
- Line the vanity drawer and the storage dresser drawers
- Purchase and install a toilet paper holder
- Purchase and install a hand towel hook
- Find a prettier toilet brush or a way to hide it.
- Install hooks on the back of the door for towels.
So just a short list.
I also decided I want to paint it a rich shade of brown, almost a cognac color.


I was having the hardest time deciding on a paint color for the walls and the shade of brown came to me in the middle of the night and brought all my ideas together. I think with gold-framed vintage and modern art, the wood tones of the furniture, the contrast of bright-white trim, and the black and white floors it will feel more aged and elegant rather than new and utilitarian, which is the look I prefer for kitchens and bathrooms.
I’ll post updates as I check off this list — here and on Instagram!
