For the past few years, my mother-in-law, sister-in-law and I have attended a local Holiday Home Tour, which features five homes in our community decorated grandly for Christmas. The tour takes place in November (in a little under two weeks), and it’s a really fun way to get excited for the holiday season, get ideas for decorating, and of course, to walk through other people’s houses and see different architecture, renovations and decor.
This year is especially exciting because my mother-in-law’s house is being featured! She and I and my sister-in-law have been working hard to finish ALL THE PROJECTS before we can even begin the Christmas decorating. In addition to all those little projects so many of us have up in the air (finishing off moldings, repairing nicks in the wall, repainting where it is needed, updating dining chair upholstery, hanging art), we also took on some big projects (painting kitchen cabinets, getting the counter tops replaced, re-tiling the powder room floor). I’m going to feature any stand-alone projects that I can, and then do a big post with all the finished decor at the end.
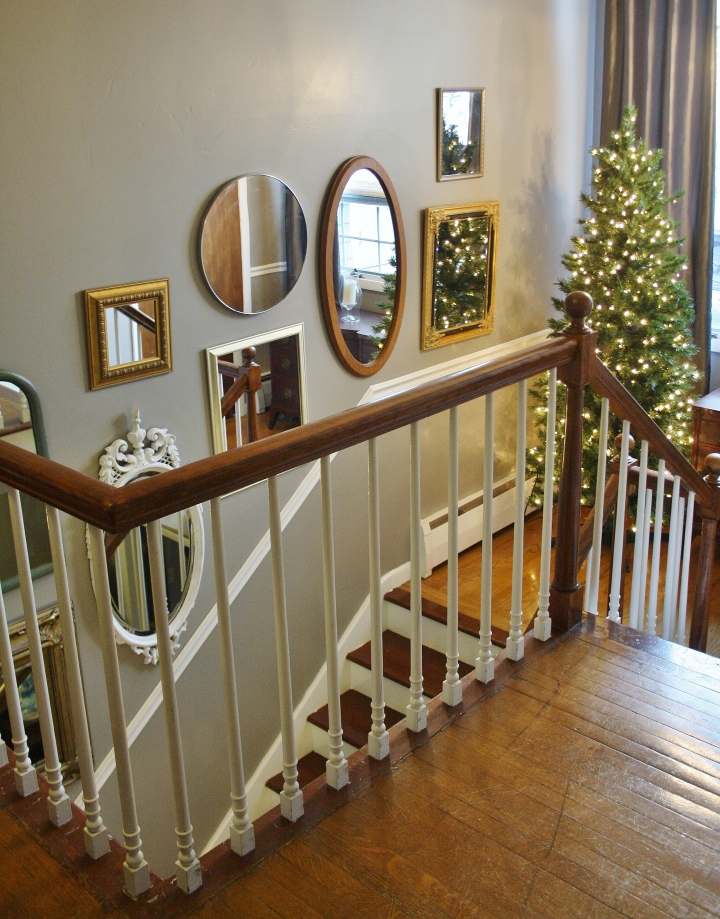
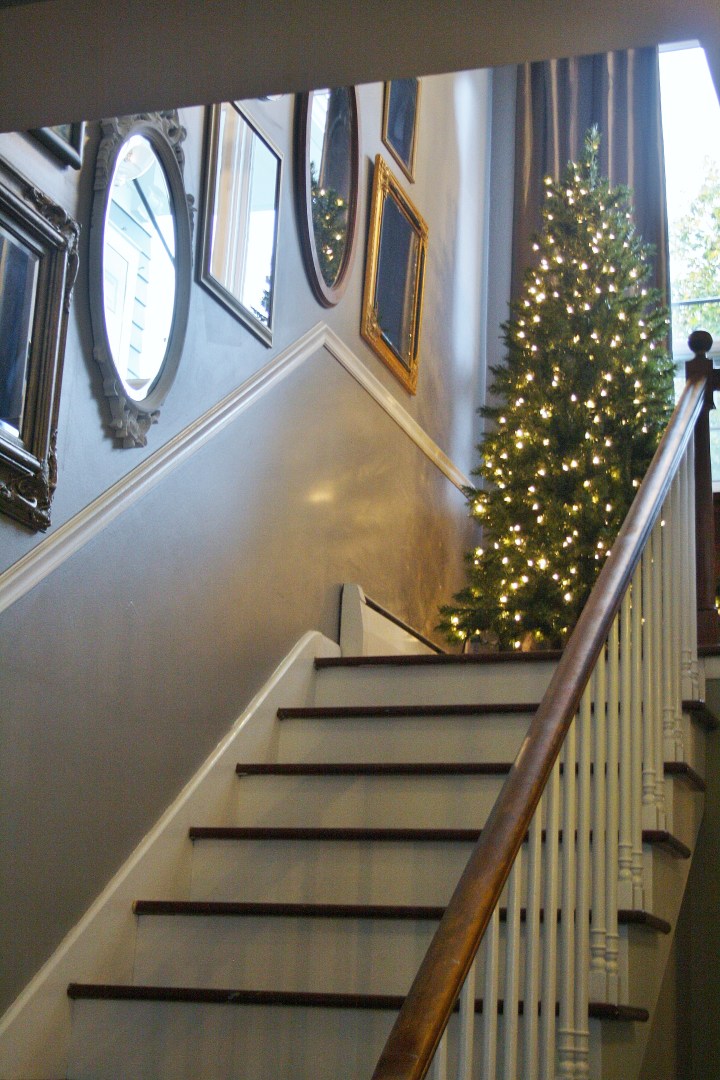
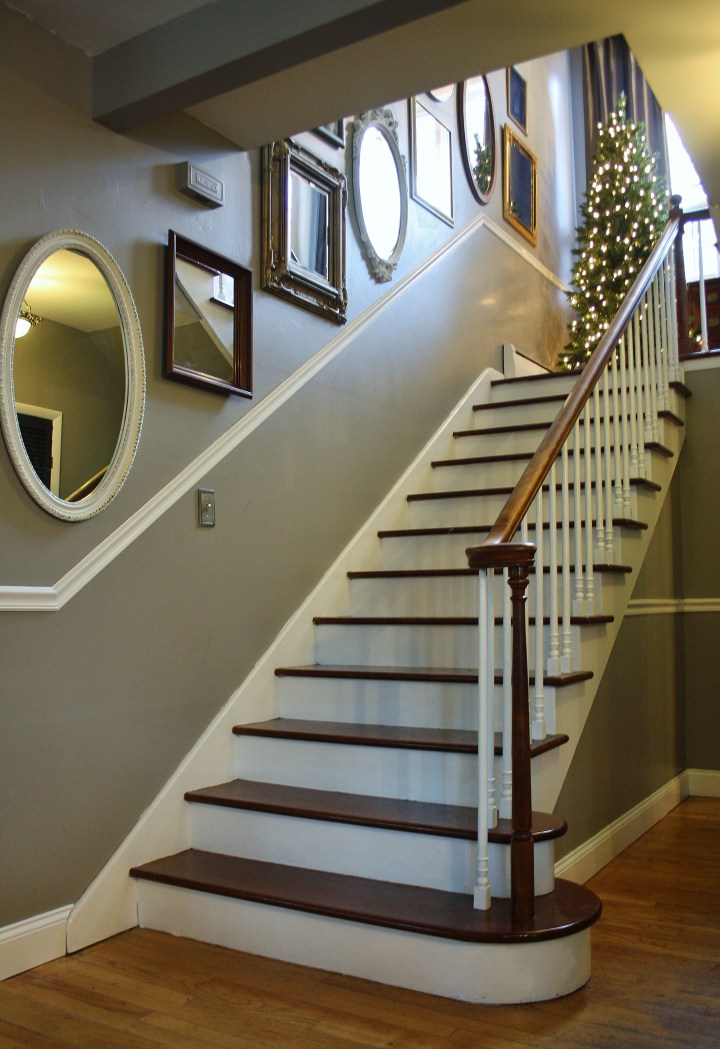
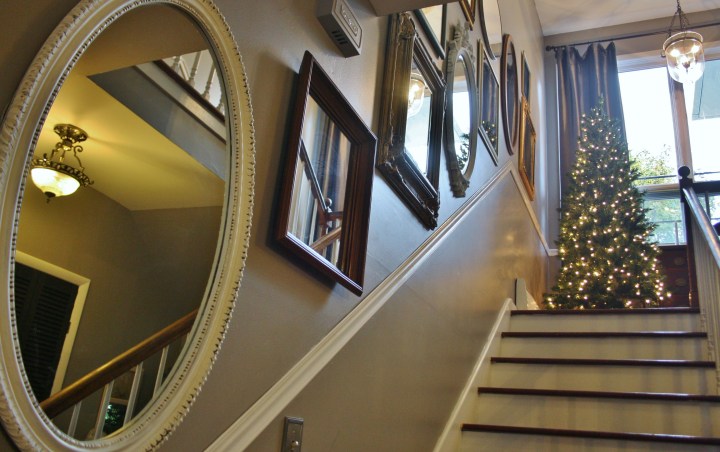
For a long time, my MIL has wanted to create a gallery wall of mirrors going up the stairs. This show was the perfect impetus to finally get it done.
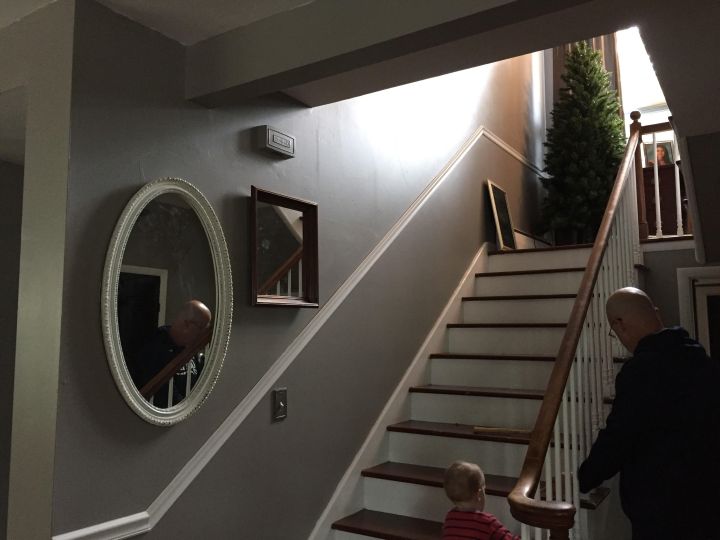
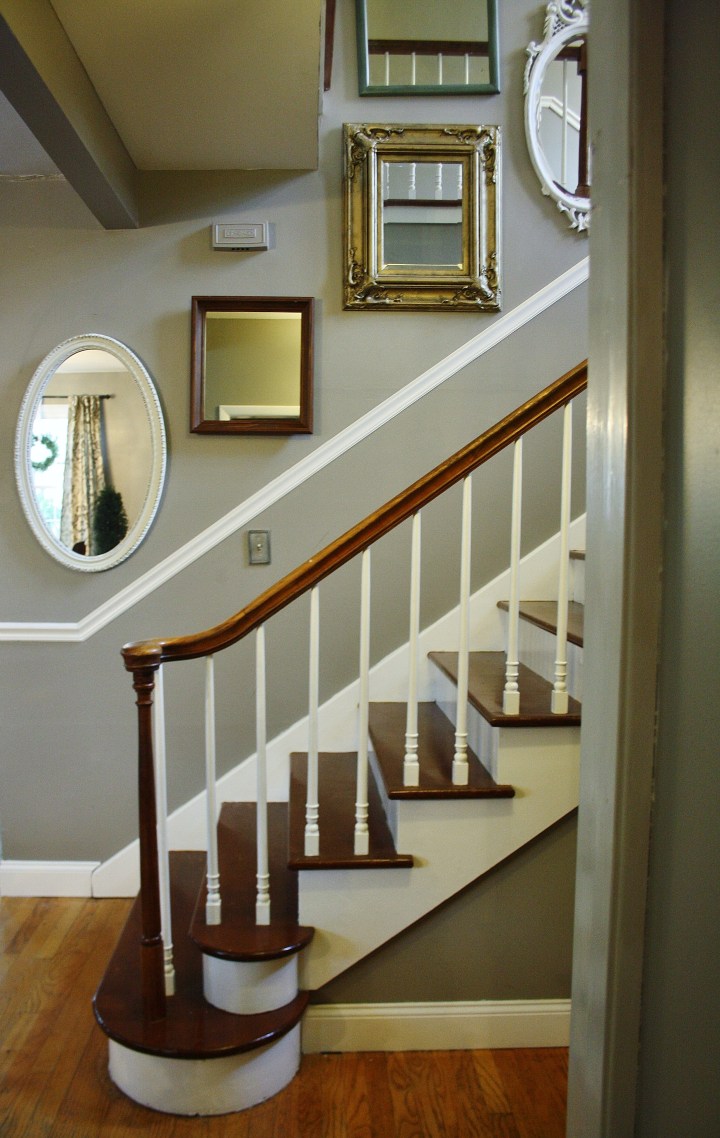
Here is the staircase before:


STEP 1: Collect mirrors in different shapes, sizes and frame finishes.
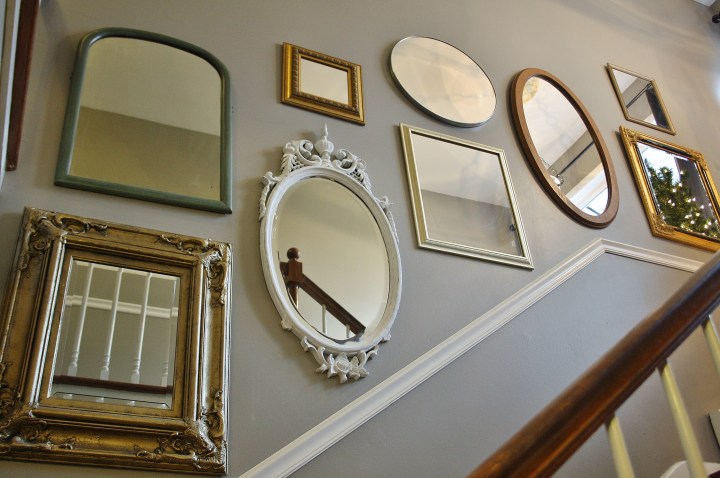
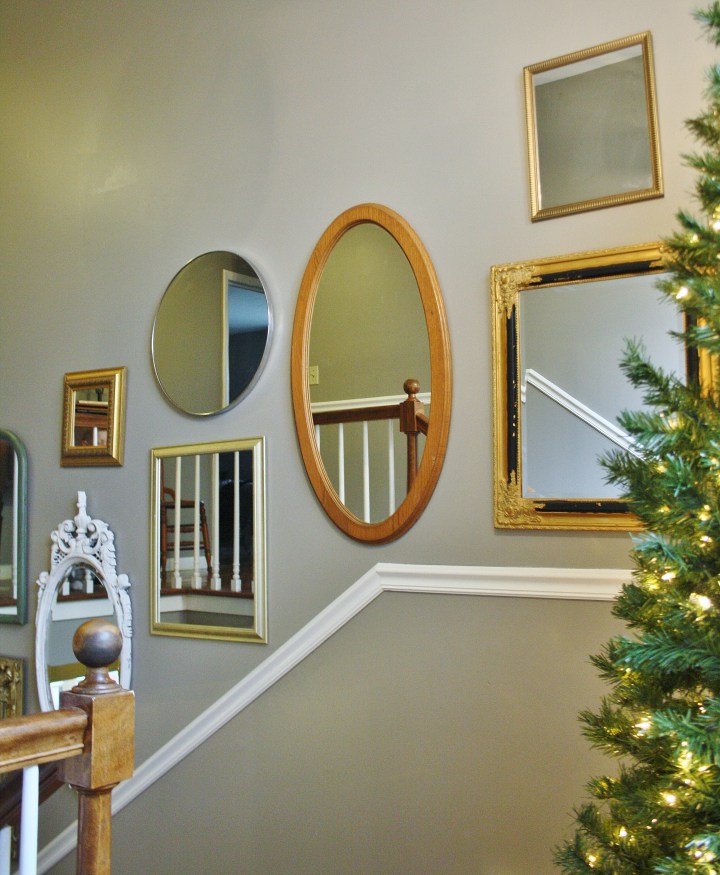
I had three mirrors I wasn’t using, my MIL had a few, too, and the others we picked up over a few weeks at Goodwill and other thrift stores — so this projects was insanely inexpensive. We had a great mix of finishes — from antique green to champagne, dark wood to medium toned wood, bright silver to old-fashioned gilt, and shapes — round, oval, square and rectangular.
STEP 2: Lay the mirrors out on the floor.
This was really helpful for me to easily visualize the different mirrors and space them out equally as they were going up on the wall.
STEP 3: Start at the bottom with a larger mirror and trace it on the wall with chalk.
We placed a large, white, oval mirror at the bottom of the stairs because it filled the long, vertical space best. To make sure we liked the order before we started screwing anything in, I traced each mirror shape onto the wall with chalk.

STEP 4: Continue adding/tracing mirrors up the stairs.
Keep roughly the same space between each mirror and the next, and between each mirror and the chair rail/banister, varying the shapes and finishes as you go. I chose the next mirror each time by the size, finish and shape. I didn’t want the same finish or shape to be next to each other at any point in the gallery wall. If a mirror appeared too small next to the last one, I added a smaller one on top of it to balance it out. Just hold them up if you’re not sure. As long as you keep roughly the same distance between each mirror, you can’t really mess it up — the point is for it to look collected and diverse. I traced each mirror as I placed it.
STEP 5: Step back and survey. Make any changes.
Are the shapes spaced out equally? Does it look balanced? Is the line of the chair rail or banister echoed in the line of the mirrors up the stairs? If you’d like to switch any mirrors, erase the chalk outline and trace another in its place.
STEP 6: Beginning at the bottom, start hanging the mirrors on the wall.
Your mirrors will probably not line up with the chalk lines when you actually go to hang them — these lines just show you the general placement. Be sure each mirror is a similar distance from the chair rail or banister and from each other.


STEP 7: Adjust.
You will probably have to adjust one or two mirrors — it happens! If you expect this, it will be less painful. I still want to make an adjustment to the small rectangular mirror at the top of this gallery wall — lowering it and turning it on its side. We also had to lower the white mirror at the bottom in the end, and we are looking for a small rectangular mirror to place horizontally above it to fill that space.
NOTE: I think these gallery walls look more purposeful and modern with a majority of larger mirrors as opposed to lots of tiny ones, but this is up to you and your taste. Here was my inspiration:


And, here are the afters!
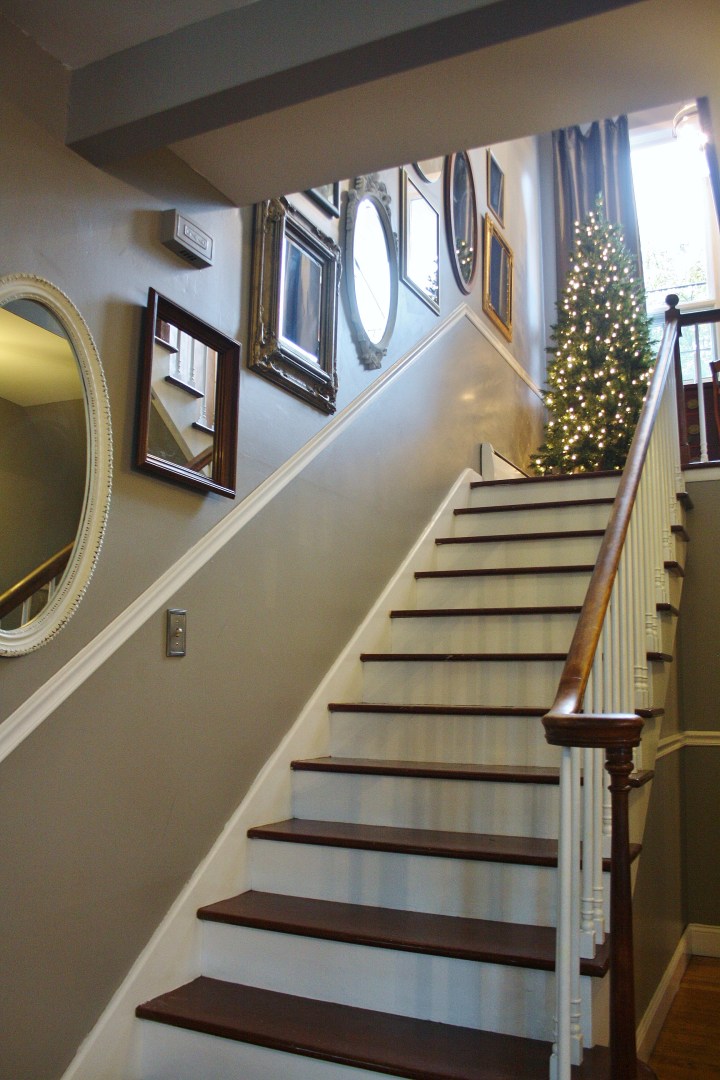


Check out the before and afters! Isn’t it a great transformation?


Jessica: The staircase came out beautiful! I so enjoyed visiting with you and your family – Thank you for sharing your wonderful ideas and tips on how to do it yourself.
Judy
I’m so glad that you enjoyed it!!
Beautiful!